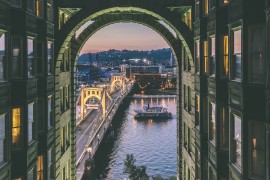
I’ve been wanting to incorporate a panoramic style into some of my Street Photography (primarily because I have not seen this done much) and I decided to devote a good amount of time to it over the coming weeks. The challenge to panoramic images is isolating a single point of interest or subject while encompassing such a large field of view.
Commitment
The time commitment required for a good panoramic image can easily surpass 30 minutes. There will be a lot of trial and error and you will want to do multiple series of the same scene to make life easier in post processing.If you’ve looked at much panoramic photography you’ll notice they are done much the same way as someone would use a very wide-angle lens (14-16mm). The biggest hurdle you’ll need to overcome is the desire to squeeze absolutely everything into your image. When shooting with a wide-angle lens or creating a panoramic image the goal is NOT to try to focus on EVERYTHING. This may seem counter-intuitive but trust me, trying to focus on everything will create hum-drum images more often than not.

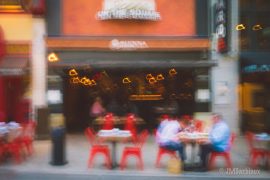
Things like the number of frames used, perspective chosen, and focal area can make or break a panoramic image. The image below has one less frame than the one above and uses a different perspective in processing. Knowing which perspective is best comes from trial and error, don’t be afraid to test them all out.

What makes panoramic images interesting is the same thing that makes every other type of image interesting… Interesting subject matter. This is even more difficult with wide-angle lenses and panoramic stitching because you’ve put so much in the frame that points of interest can compete with one another.
Contrary to popular tutorials I would actually recommend you use a narrow aperture and try to keep the most interesting point razor-sharp and let the rest of the image blur away. This can be difficult because you are stitching many images together, if you aren’t careful you’ll have razor-sharp areas in each image and blurred areas scattered throughout.
Tip:
If you shoot in auto-focus you can use that to select your point of interest (in order to keep it nice and sharp) and then switch to manual focus for the remaining shots. This will ensure that your depth of field remains constant in each frame. You can see in the image below that my depth of field covered about 10 feet from the camera the entire way around.
If you’re looking for a challenge, grab your camera and create a panoramic image that doesn’t simply capture a vast landscape, create something more than a large snapshot. Find something interesting in the foreground and make that your subject, then include the vast surroundings as your context instead of the subject matter.
Things To Remember
Which lens?
It’s important to remember that when you’re creating a panoramic image you don’t want to use the widest angle lens you own. Panoramic software has to correct as much distortion it can in each image and then stitch it together without making it look like you’ve taken a photograph of a puzzle. Wide angle lenses can be very difficult for this type of software to handle because of the complex distortion happening in the fore and background. I’ve found the best lens to use is the 50mm lens because of its limited distortion.
How much overlap do you need?
The best results I’ve achieved have been from photographs with 15 – 30% of the image overlapping the next image. If you try to combine frames that only overlap by 5% or less you may end up with nasty lines where the images combine with one another.
Which Tripod?
The tripod you use does not matter so long as you can keep your camera level and rotate it as needed (while keeping it level). I like tripods with a built-in level but you can purchase after market levels that attach to the hot-shoe on your camera if you don’t have one.
Some cameras, like my Nikon Df, have a built-in level that you can see in the viewfinder and on the LCD when using Live View.
Grab your gear and give panoramic photographs a try. Think outside of the box and create something different from what you’ve seen before. Be sure to share your images with us on the PhotolisticLife Flickr page. Also, check out the next photography workshop I’ll be holding in Pittsburgh on July 25th and 26th… You can find more information on the photography workshops here.


