
In a previous post we talked about how to get up and running with manual mode on your fancy camera, today we are going to go in to a little more depth on shutter speed.
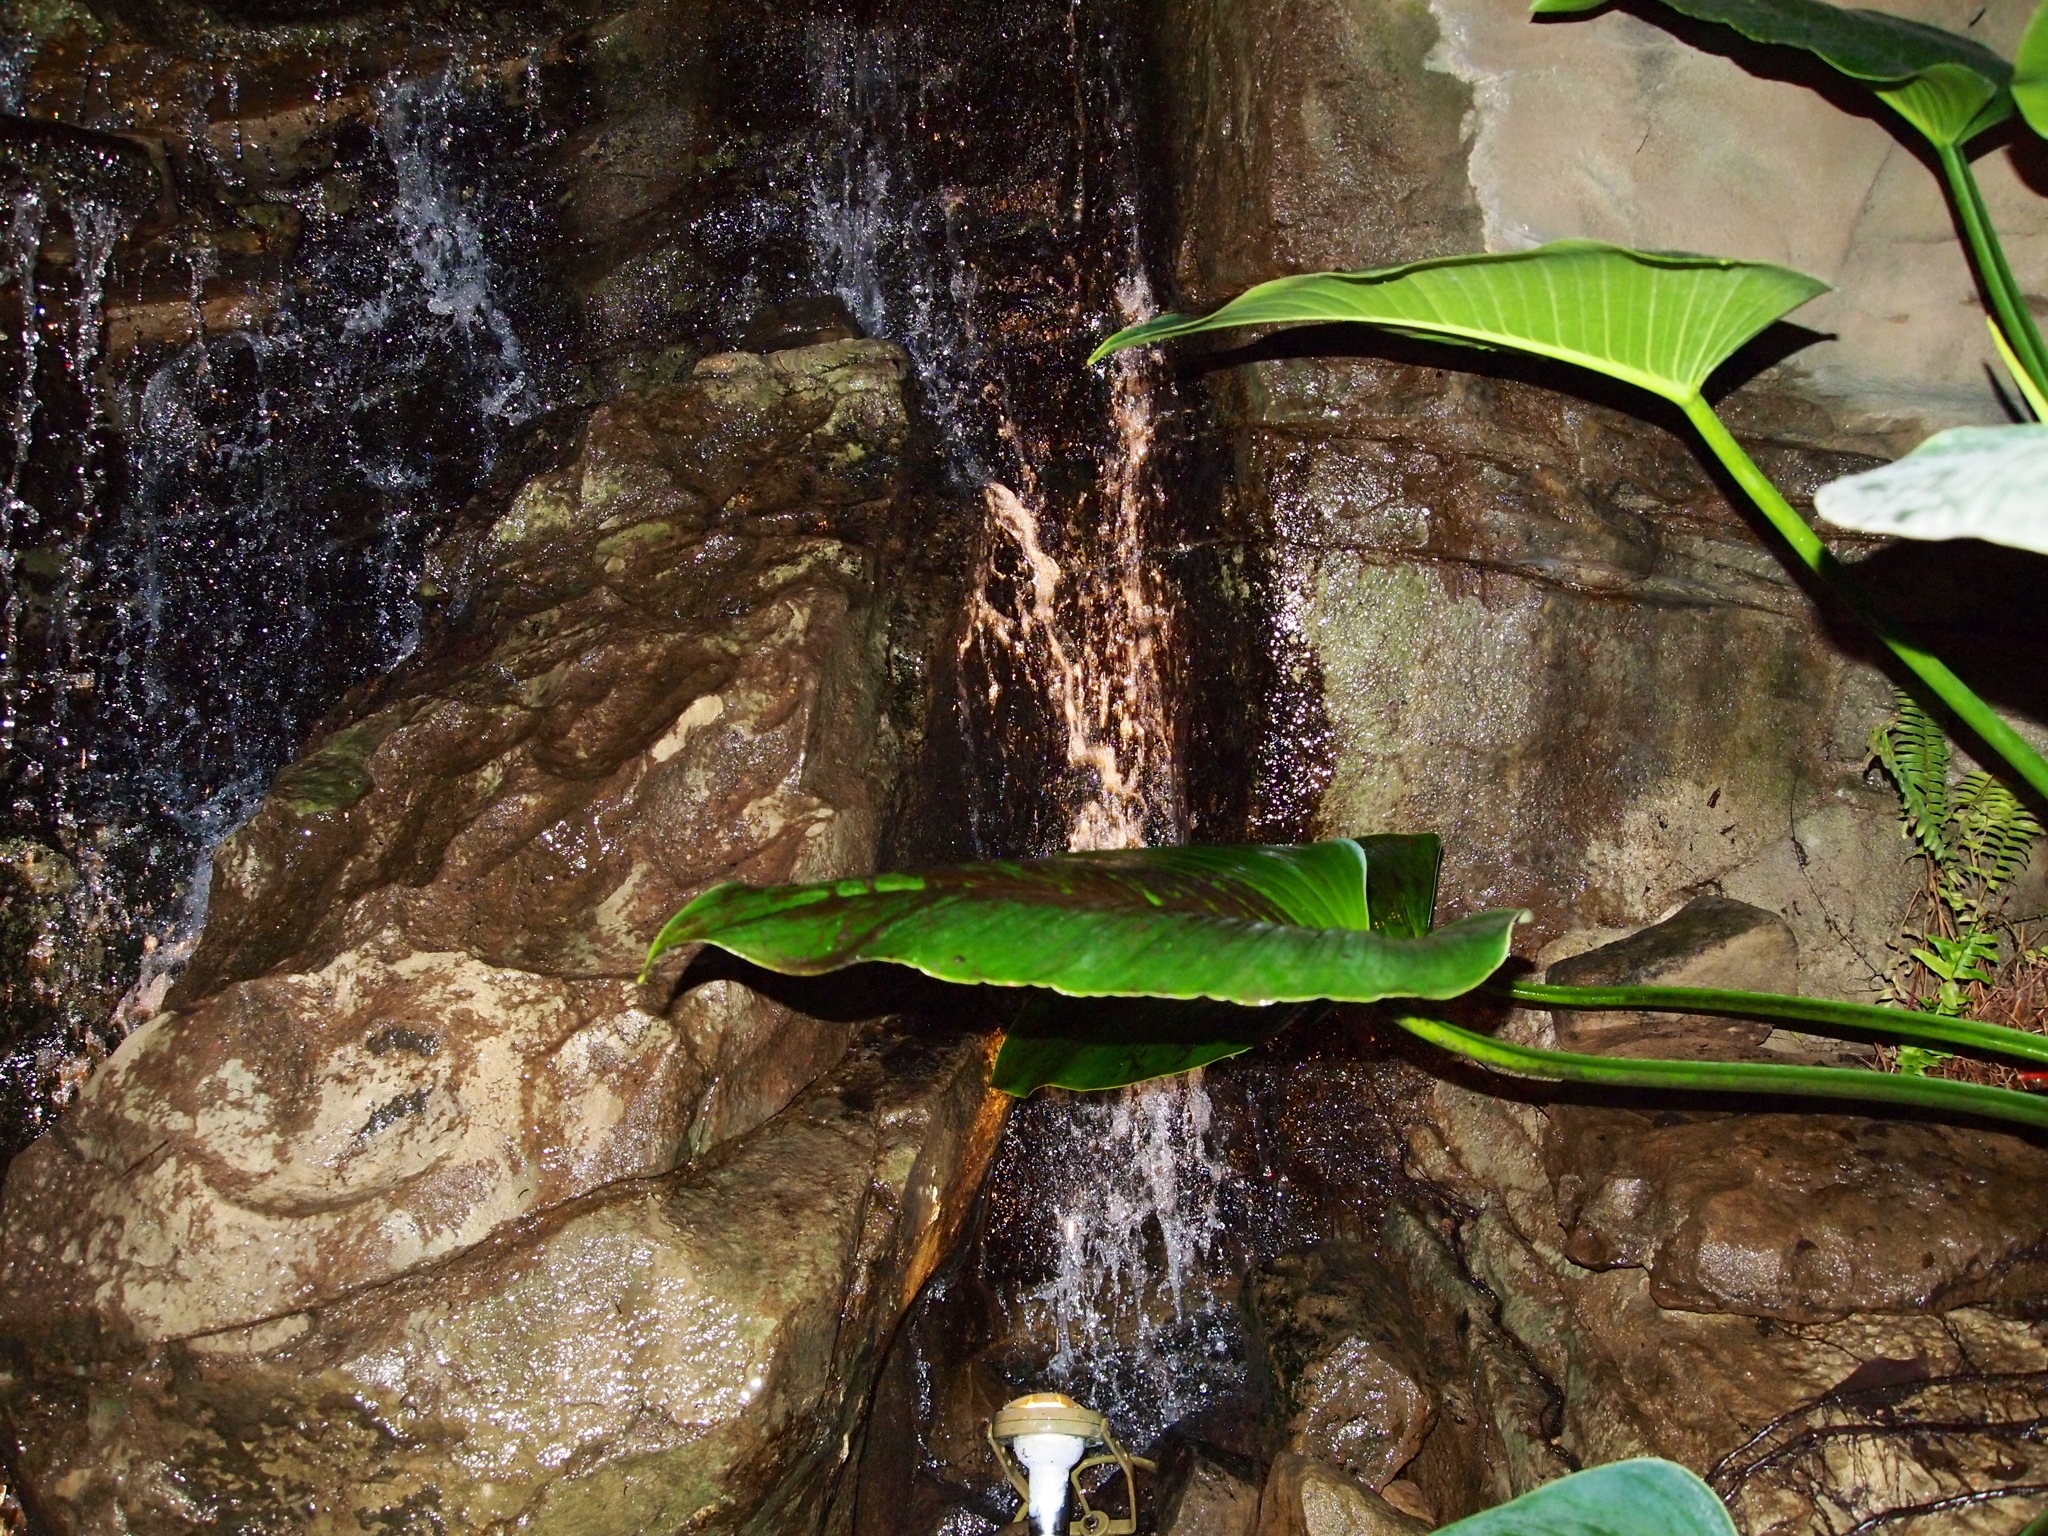
The photo above was taken at the Phipps Conservatory in Pittsburgh, PA. Notice how the waterfall looks as if it has frozen in time, neat right? It’s so easy, just pop into your camera’s settings and speed up your shutter speed to 1/1000ish and the water will freeze in time when you snap your picture. This speed is also great for fast-moving birds, butterflies, or sugared up children. Here is where it can get a little tricky, let’s make the waterfall look silky smooth now.
When you want that cool smooth look, almost smoky looking, your going to need to slow your shutter speed down. There are a couple of things we need to watch out for:
- Over exposure
- Blurring from camera shake
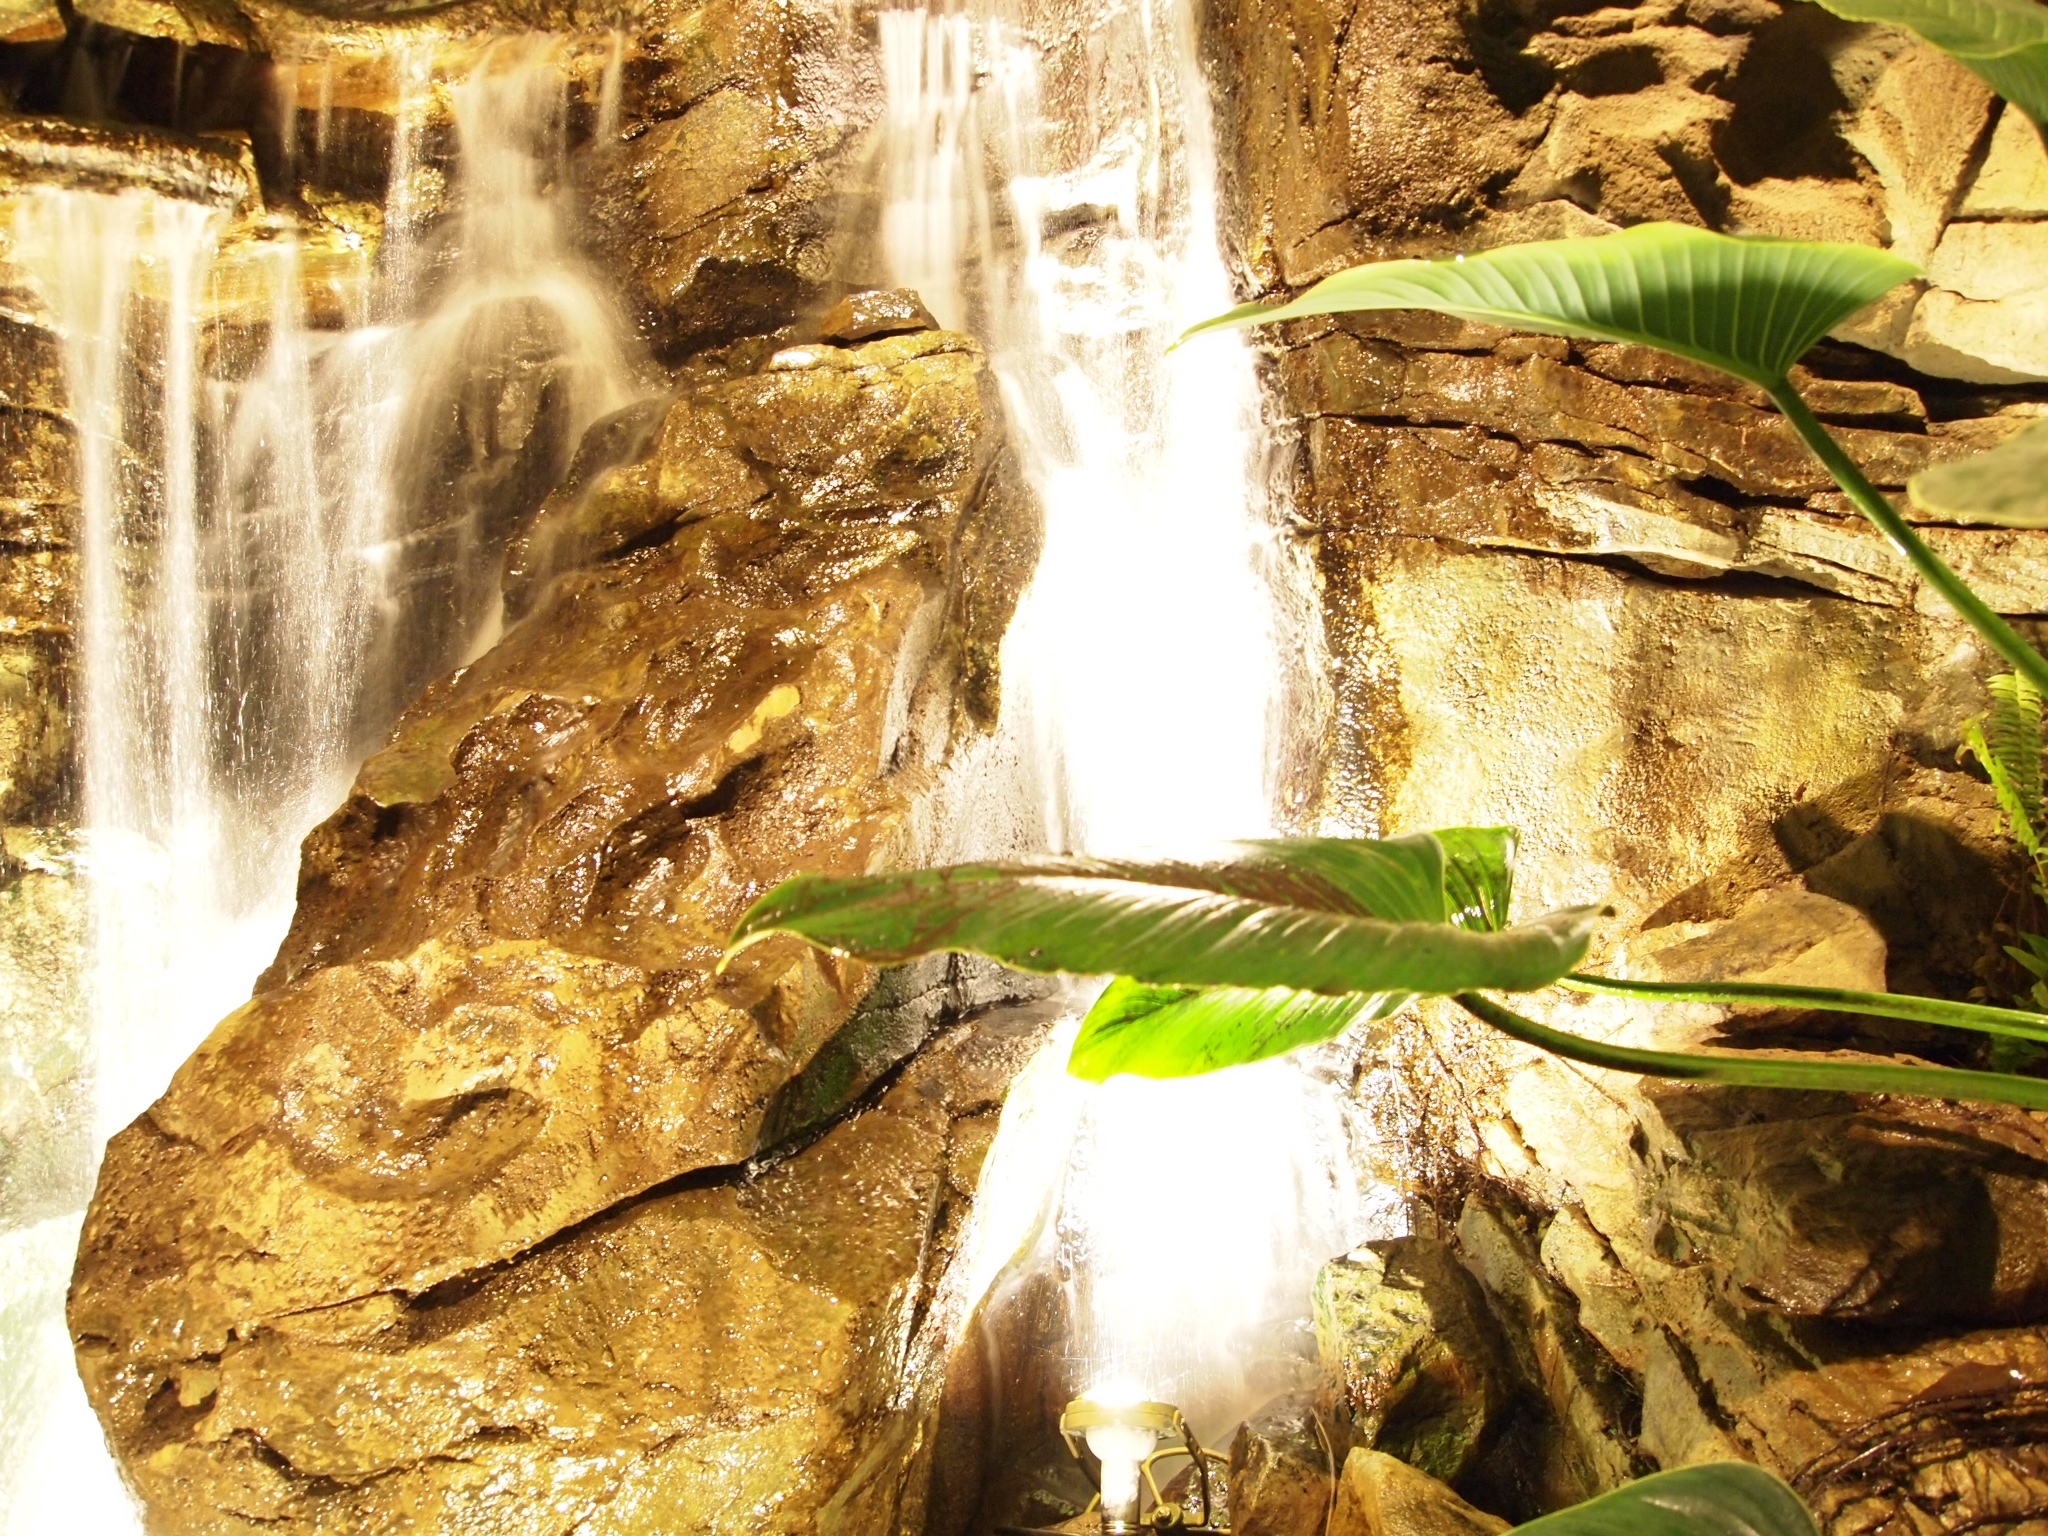
The picture below is of the same waterfall but when I slowed the shutter speed down I didn’t compensate for the additional light that would be let into the camera so the picture looks a bit over exposed compared to the top one.
Over Exposure: The best way to compensate for a slower shutter speed is to adjust your aperture to reduce the amount of light by the same amount you increased it when you slowed your shutter speed (remember, when you go down a notch on shutter speed you need to go up a notch on your aperture to equal it out again).
Blurring: Either use a tripod or set your camera on something steady. You can try to hold your camera close to your body and as still as possible but its likely you’ll still get significant blur due to your inability to keep your body perfectly still… unless you’re a brain surgeon with incredible control. Another great idea is to set your camera on a 2 to 12 second delay so once you press the button you can step away from the camera and let it snap the picture itself so you don’t shake it with your violent pressing of the shutter button. Personally, I highly recommend the tripod approach.
After adjusting my aperture to compensate for the slower shutter speed I was able to come out with a better photograph (below) closer to the exposure I was looking for. Is it perfect? No, but it’s a step in the right direction. I for one will continue to practice, practice, practice. Or just give up and copy and paste images from google images into my photo album (kidding). Good luck!

Comments are closed.