Francis Bacon once said “In order for the light to shine so brightly, darkness must be present.” Nowhere could this be more relevant than in photography. If you take away the darkness, you upset the natural balance of things. Light and darkness give your photographs depth and mood. Understanding how light interacts with your camera and the subject is paramount. The angle, temperature, and intensity of light can wield wildly different results of the same subject/scene.
When you think of light in a general sense of the word you think of your aperture, shutter-speed, and ISO… And so you should. Every photographer who has stepped away from their cameras automatic mode have danced the dance of nailing proper exposure while controlling the desired depth of field with their aperture. The study of light, for our purposes here, goes well beyond this simple understanding of the correlation between different camera settings.
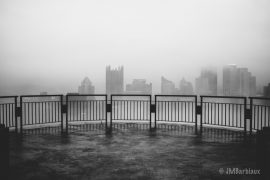
One of the first times photographers, sometimes inadvertently, study light is when they tackle their first sunrise or sunset. As you probably already know, your camera does not have the dynamic range your eyes do… Therefore, the subtle differences in light in a scene like the sunset above is too much for the sensor in even the most advanced camera to render an image the way our eyes would have perceived it. So you have three choices, right? Expose for the highlights, expose for the shadow area, or exposure bracket and create a high dynamic range image. What if their was a fourth choice? What if you exposed your photograph as if you were painting it?
There are three main aspects of light that you will want to familiarize yourself with; intensity, direction, and temperature. Some of these can be altered in post processing but all of them demand a good foundation before you can work on them in programs like Lightroom or Photoshop. I’m going to briefly touch on each characteristic of light below.
Intensity
Light intensity ranges from subtle to harsh, seems obvious right. What may not be obvious is the impact the intensity of light is having on the perception of your images. Do you know whether your photographs make viewers feel calm and comfortable or do your images leave viewers full of suspense and intrigue? Do the colors pop in an almost three-dimensional way or has the photograph got a more muted palette?

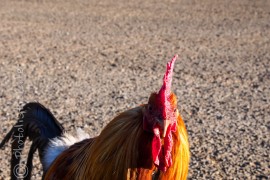
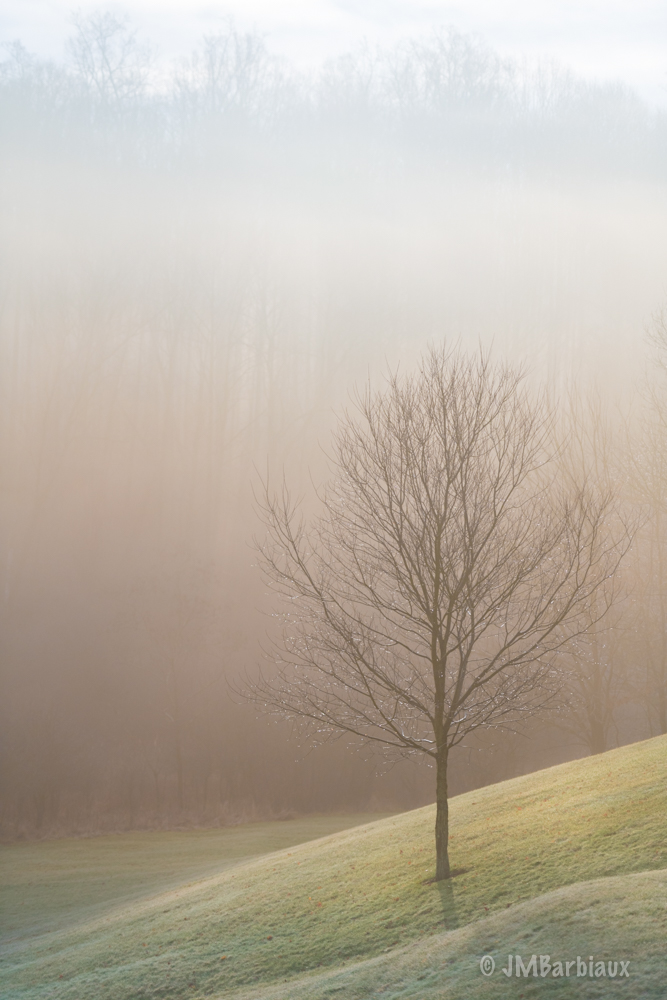
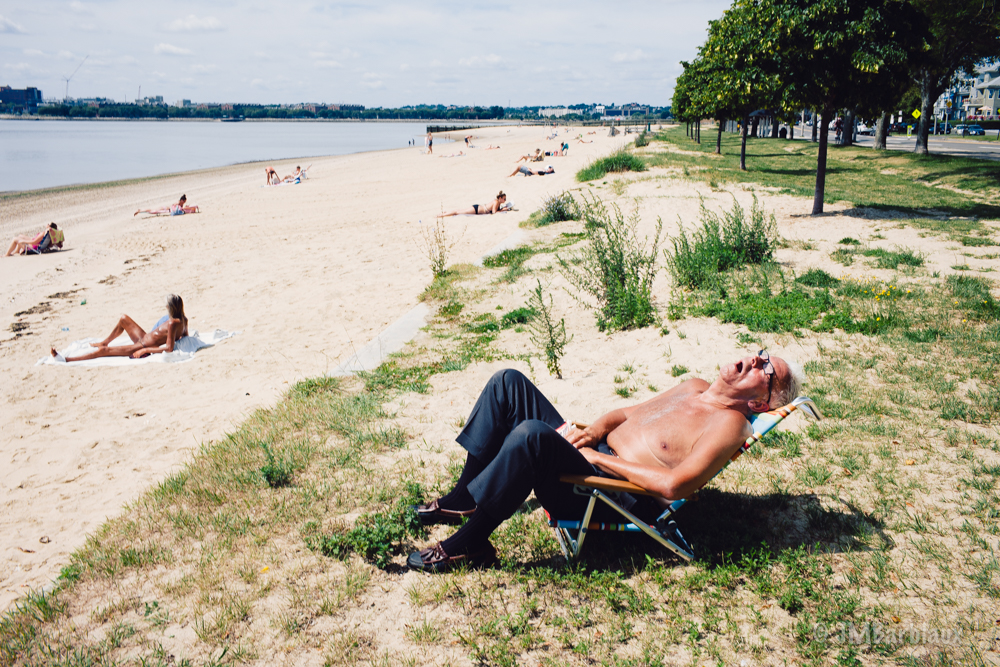
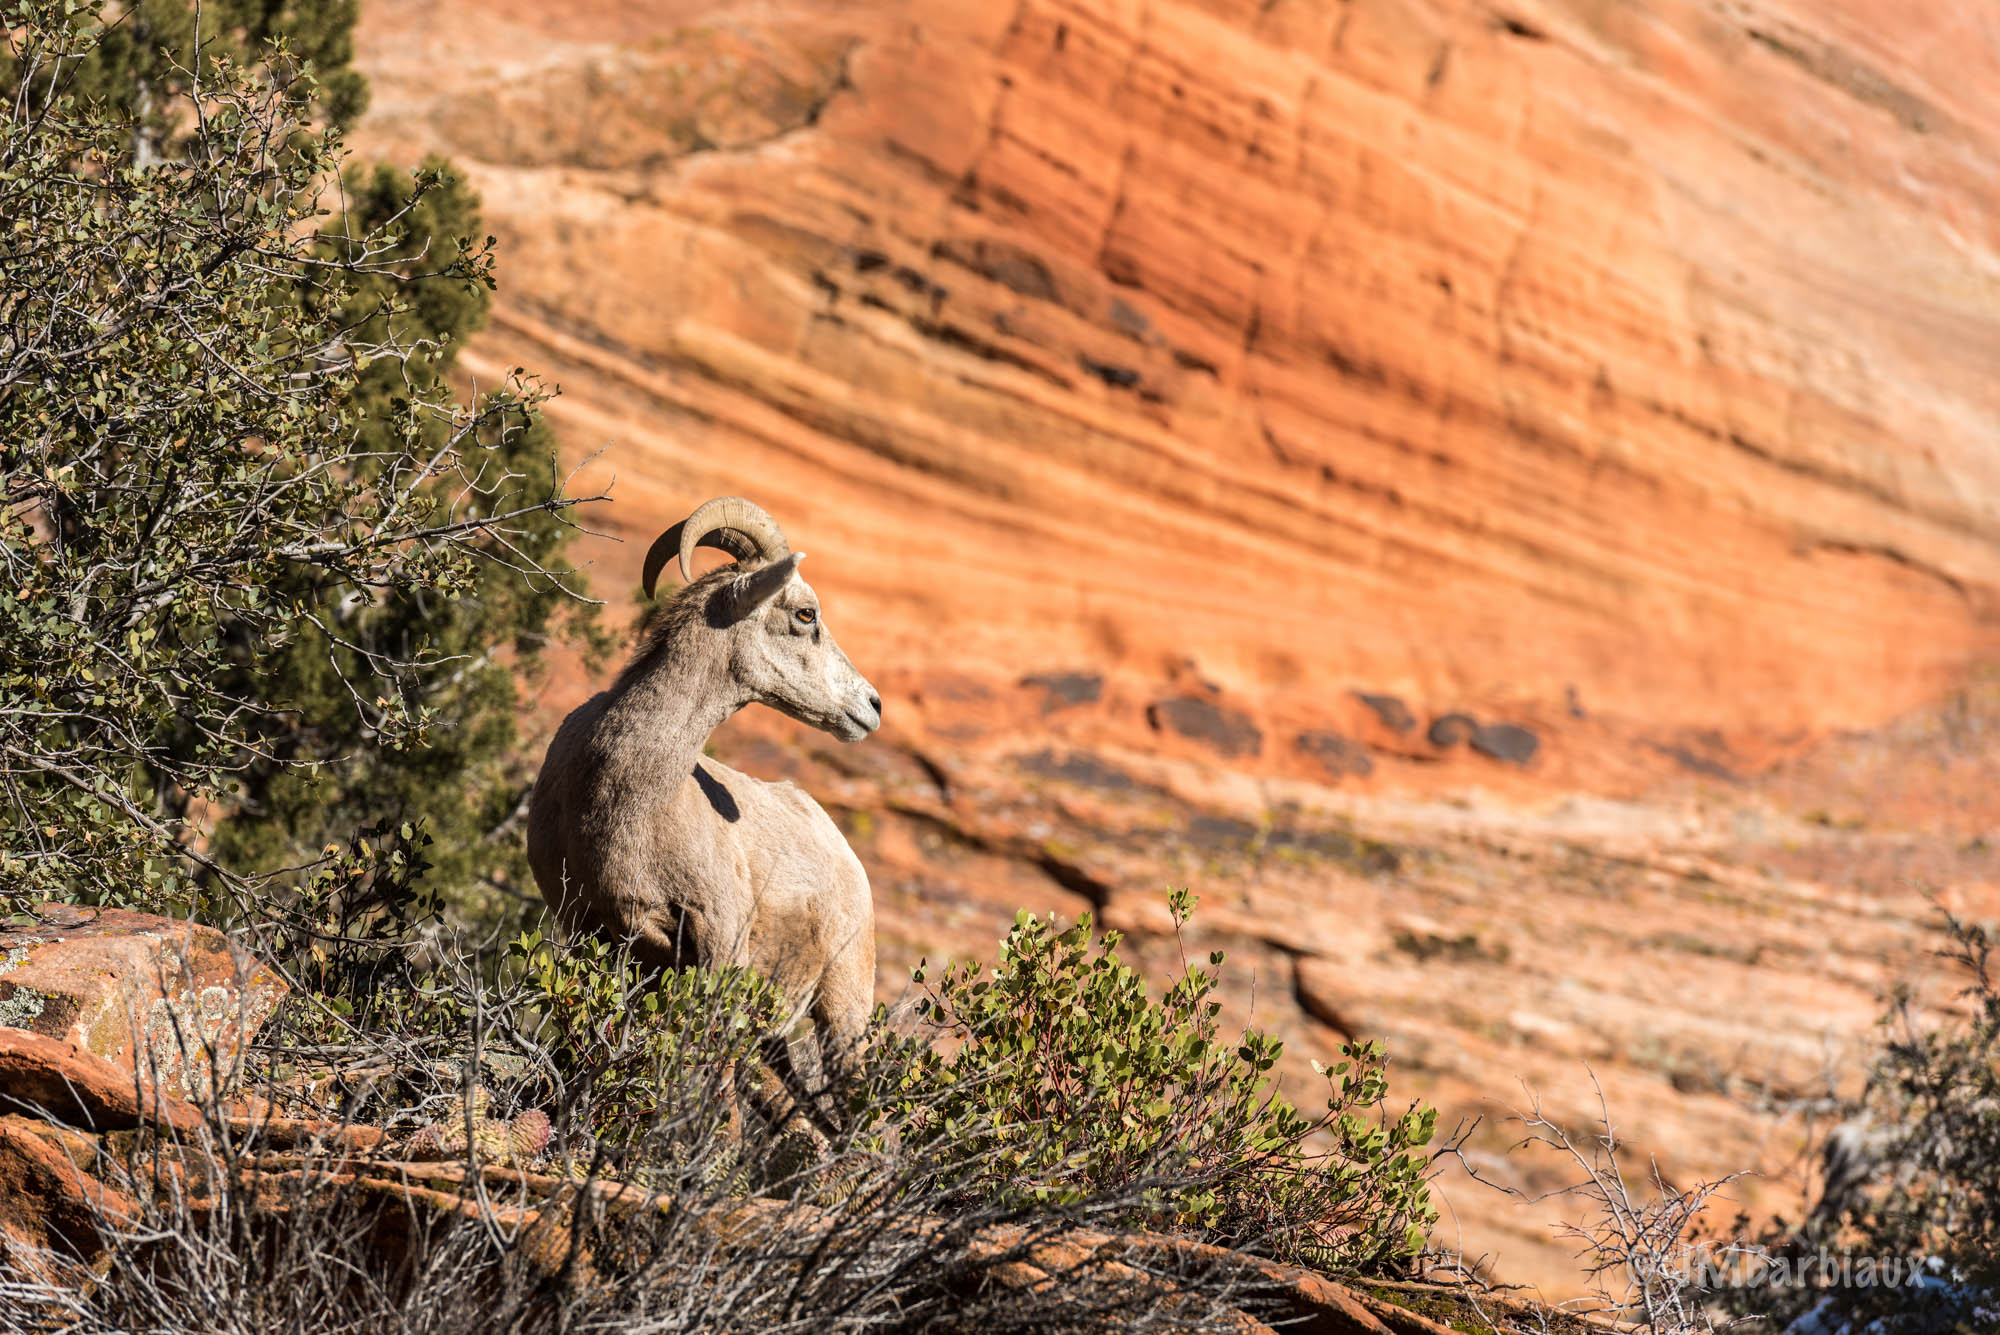
Interestingly, the intensity of the light will impact each photograph differently depending on the angle and content of the image. The image directly above is a great example of using intense light to make the colors and subject pop in the photograph while the image below uses intense light to create a more washed out palette that is almost painterly. Intense light is simply really bright light (sorry if my scientific definitions are too sophisticated).
 The important thing to remember is that all light is useful so long as you know how to use it. Instead of hiding during the afternoon like a vampire afraid of turning to dust, you can simply adjust how you approach your subjects. I know a lot of photographers who will hang up their cameras for the better part of the afternoon because they believe the light is just too poor to create great photographs, this just isn’t true.
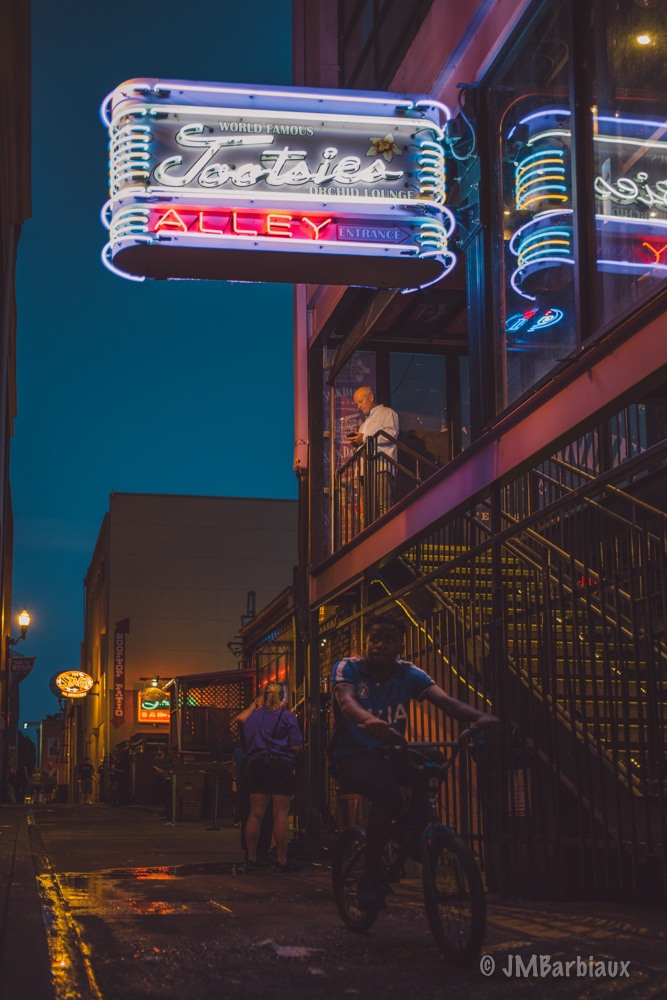
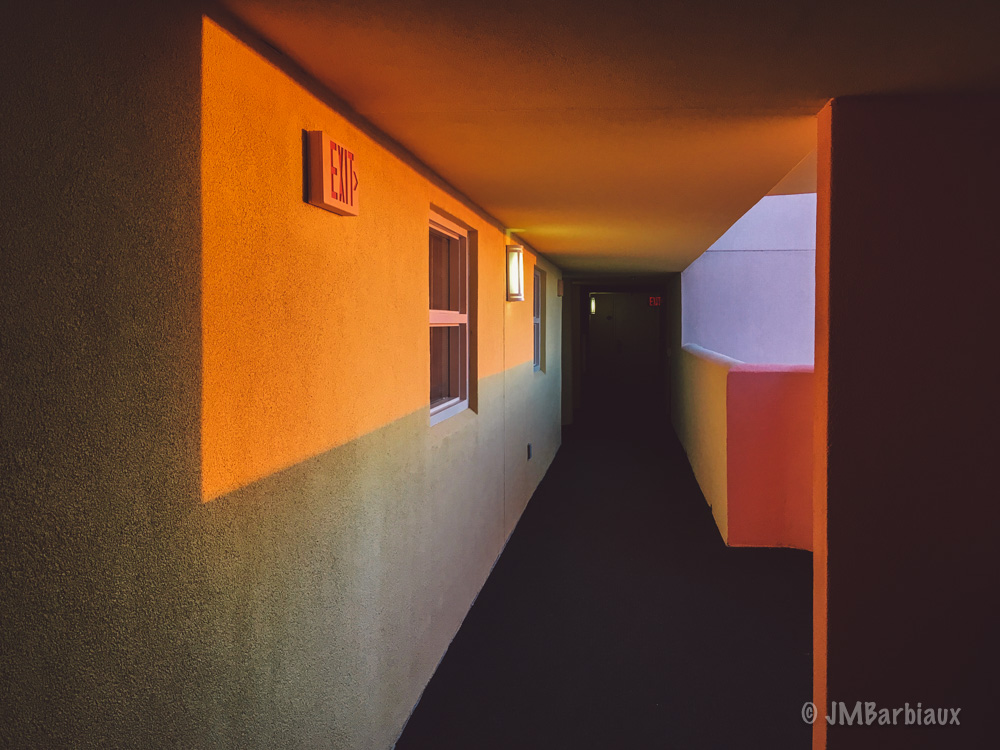
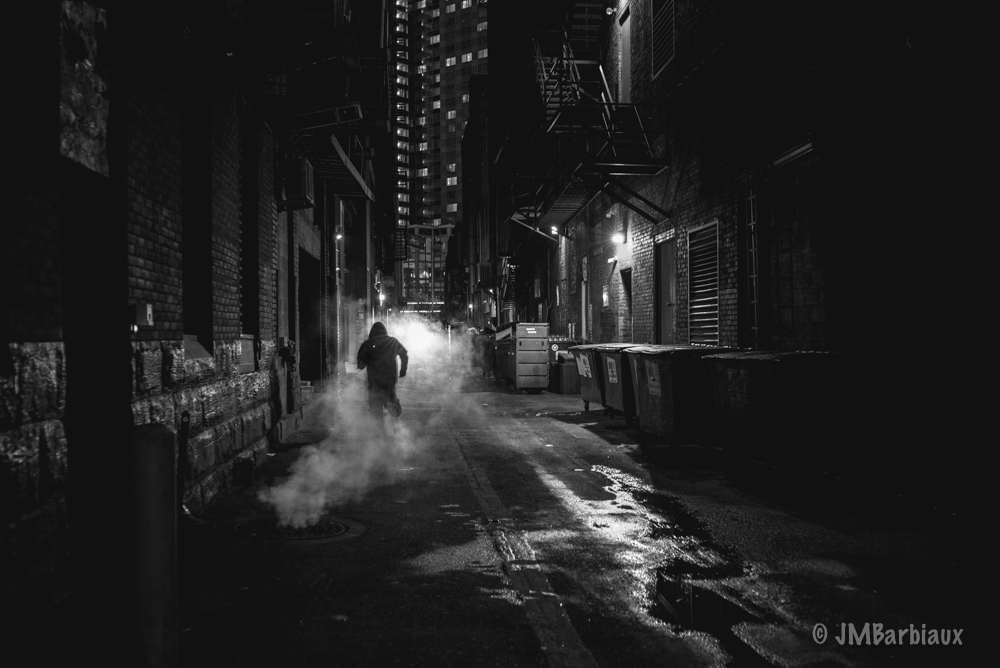
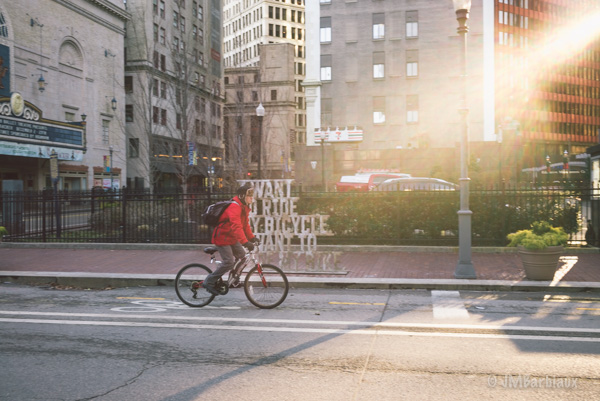
Softer light is light that seems to envelope your subjects, generally lacking hard contrasting lines. When I see soft light I tend to, and I’m going to use more technical terms here, interpret a chill vibe in a photograph. You can even use both in the same photograph like the hard light of the neon sign in the softly lit blue hour alley below.
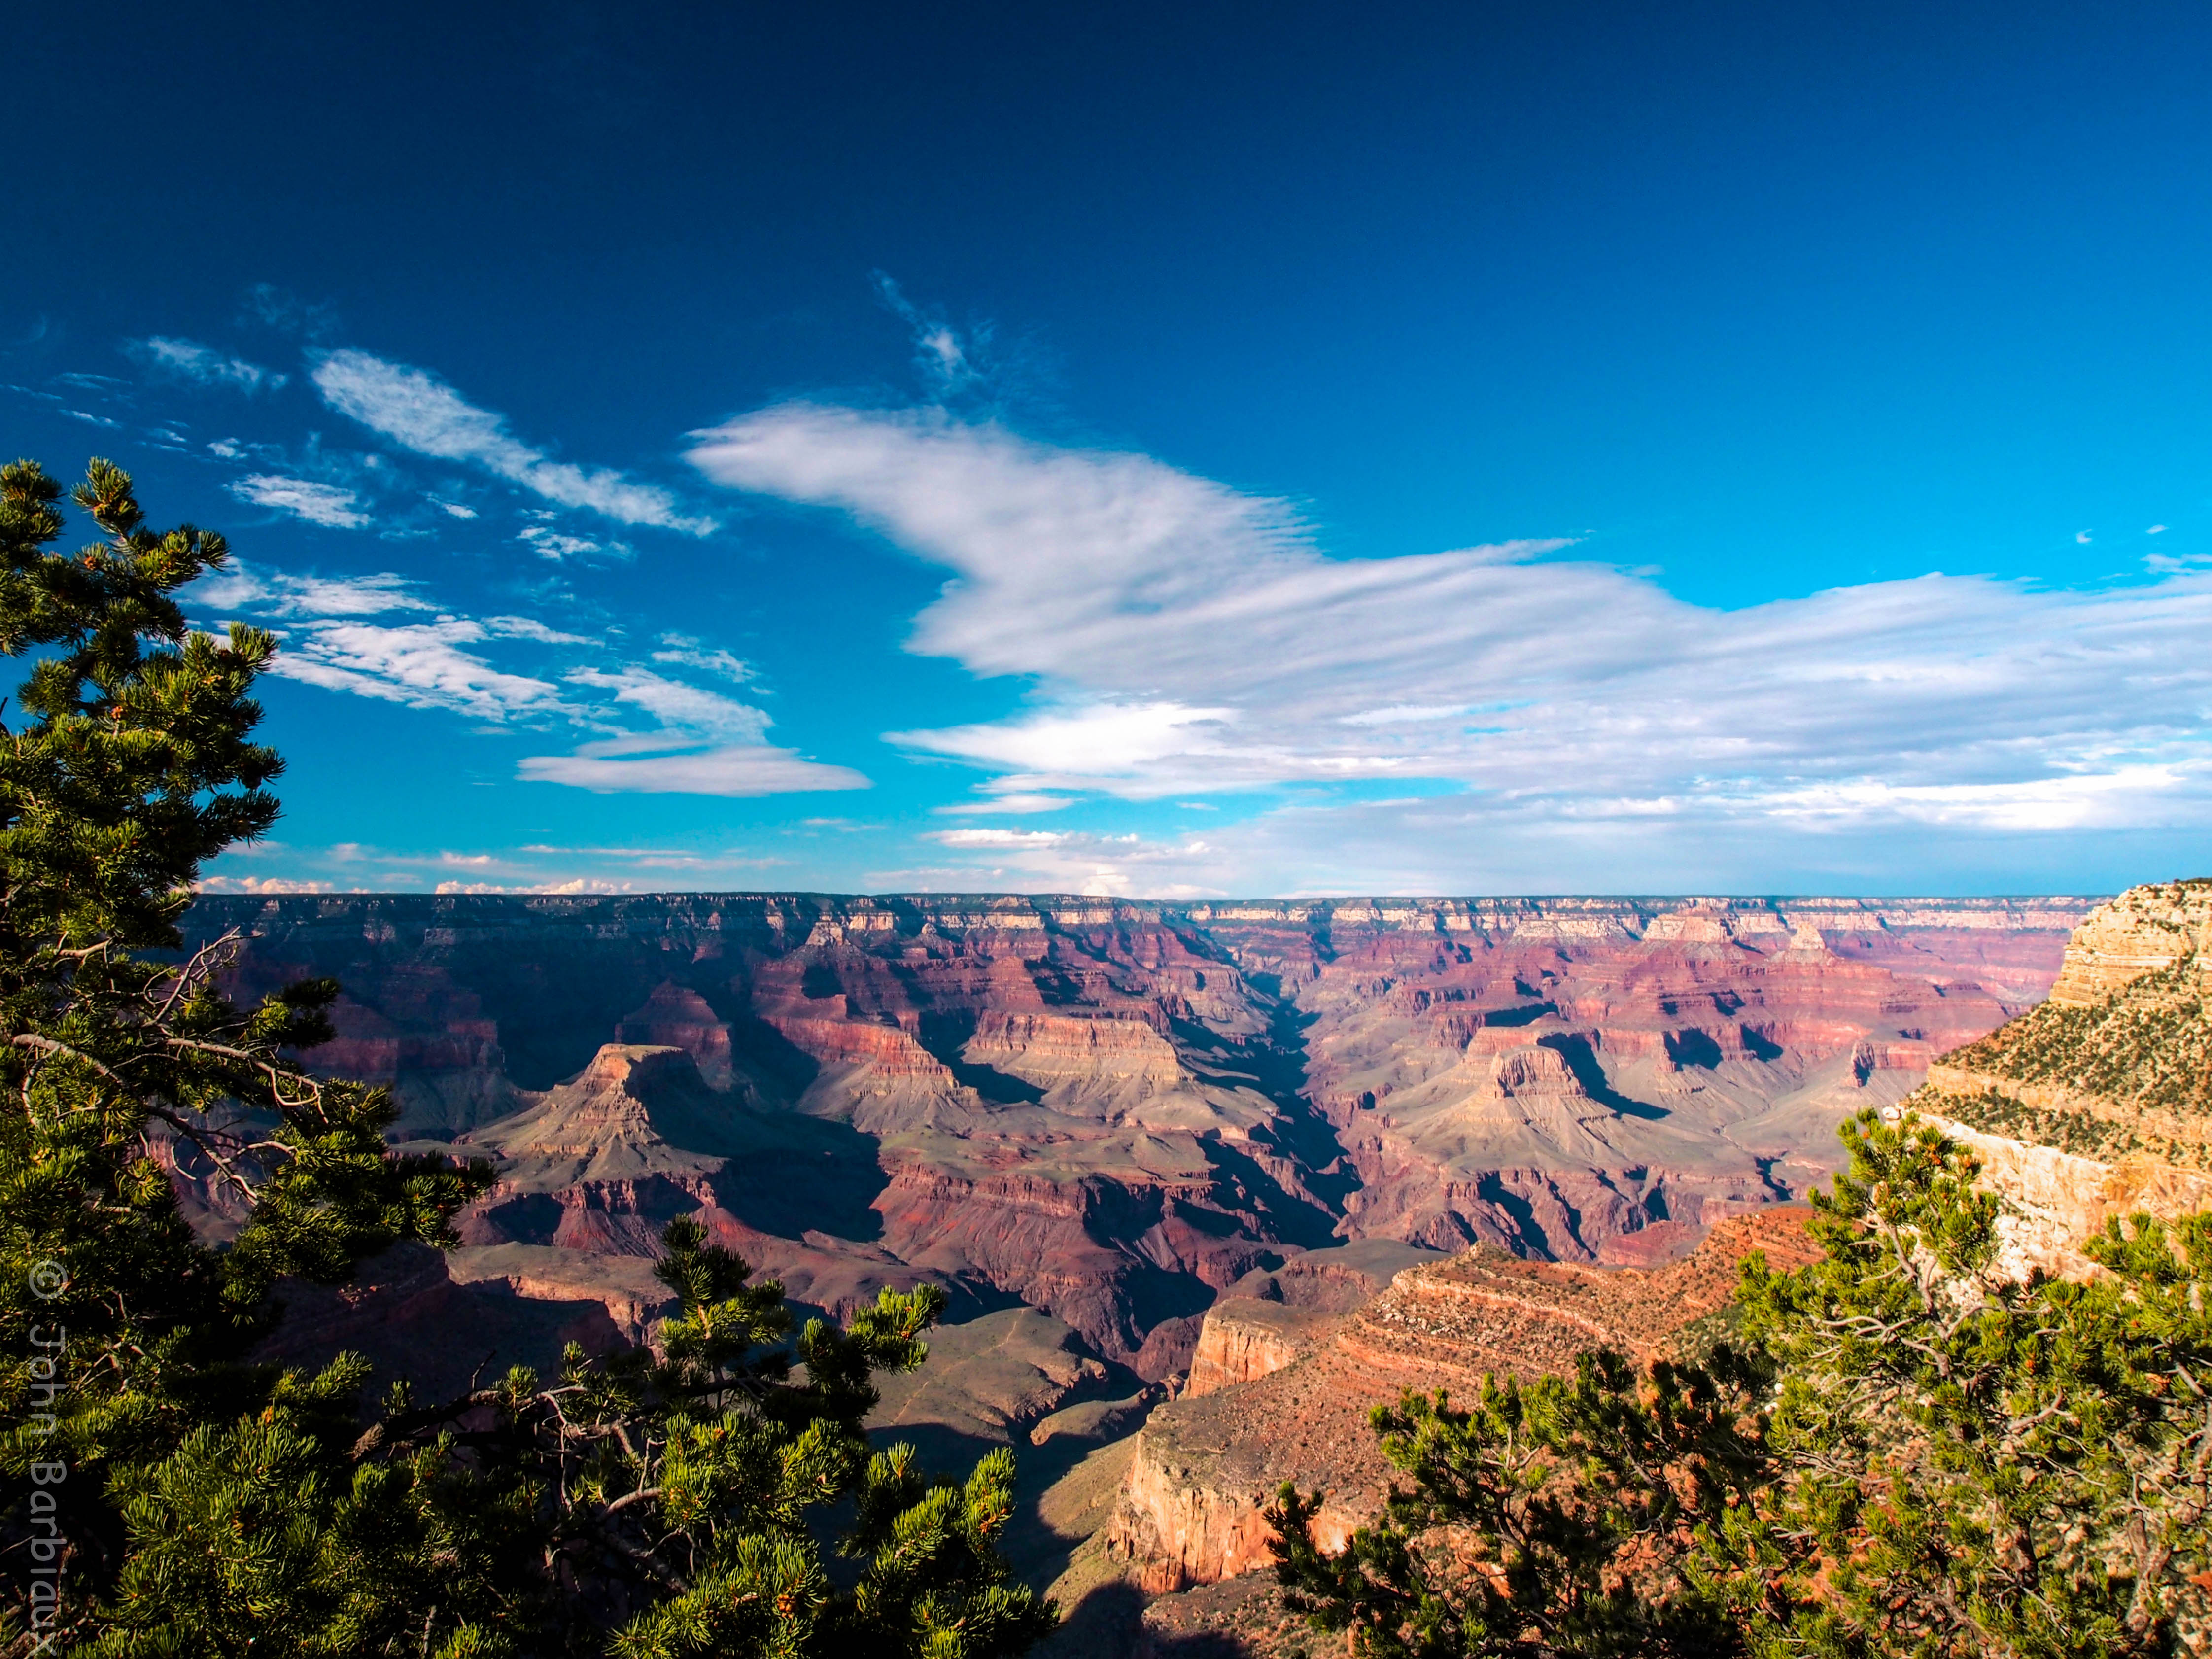
Hard or soft light is fine with me, generally I’ll use what is available. One of the reasons I love to shoot in the middle of the afternoon is I like to take advantage of the way hard light makes colors pop. Take the photograph below for instance, the hard light really makes the colors pop and the shadows it creates gives my subject some depth as well as some nice contrast in his aging features.
Direction
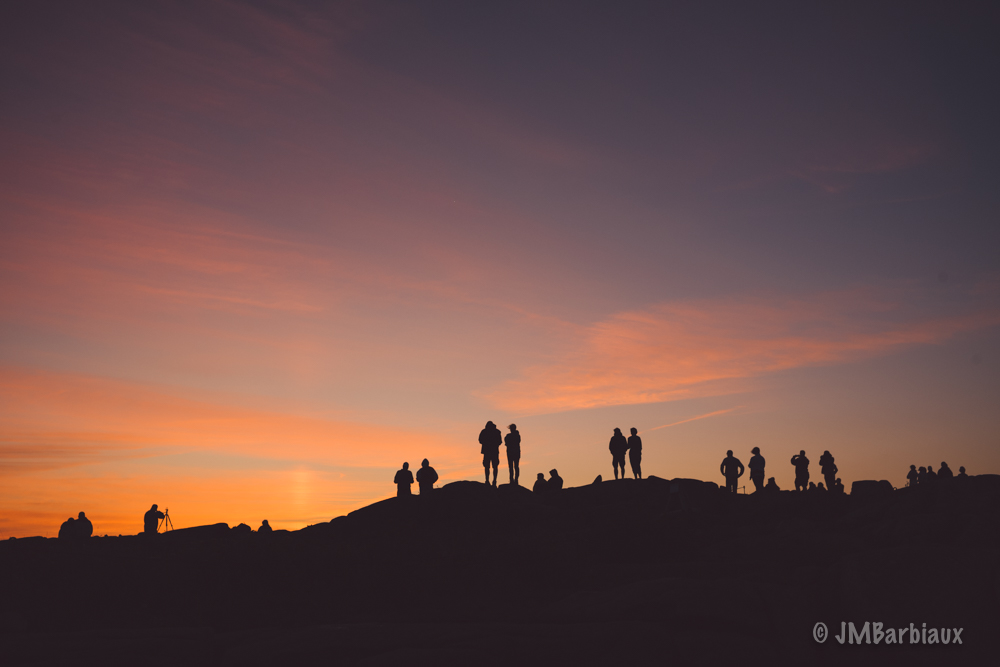
This is another characteristic of light that gets tackled fairly early on in photography, usually while shooting a sunrise or sunset as well. An extreme example of this is when we want to shoot a silhouette of someone or something, we position ourselves so that the light is directly behind our subject. Move beyond this and you literally have about 359 more degrees of direction light can strike your subject/scene… Study this.
 Knowing how the angle of light will impact your subject/scene is as important as knowing how it will interact with your gear. For instance, I know exactly how a lens hood of mine splits light when I have a direct source of light and I can use this to create a dramatic effect like in the photograph above. Had I never taken the time to study light and how to use it effectively I would probably never have “accidentally” created this shot.
Temperature
The temperature of light refers to the color balance of a scene… Too warm and the image looks orange, too cold and the image has a blue color cast. Obviously you can adjust these setting in Photoshop or Lightroom (or pick your post processing poison) so it’s not something I spend a ton of time fretting over while in the field. With that being said, that does not diminish its importance on the end result. The temperature of your image will have a large impact on how viewers perceive your photography.
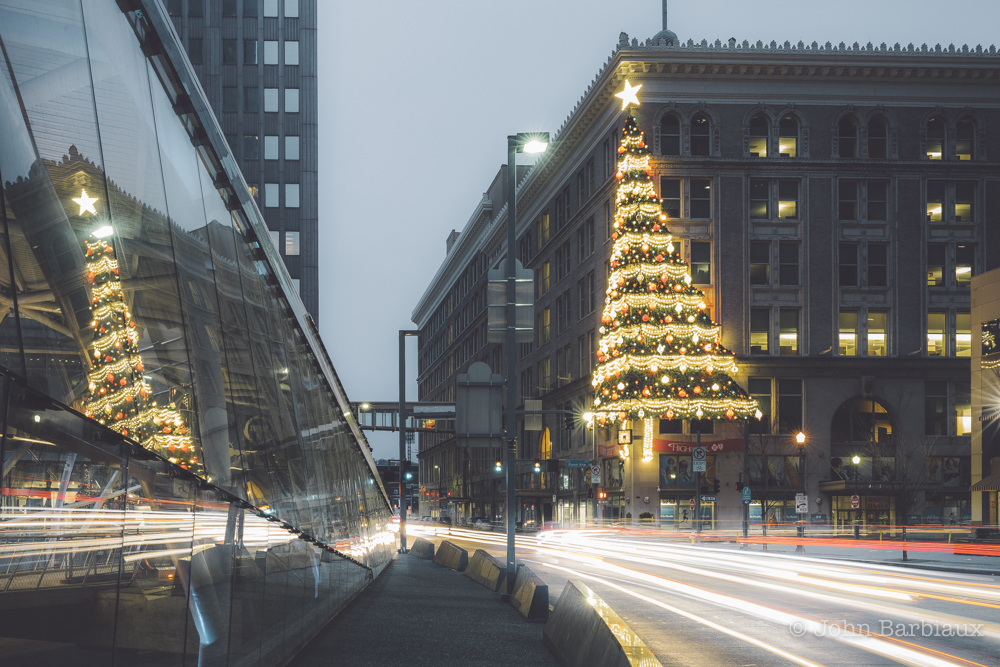
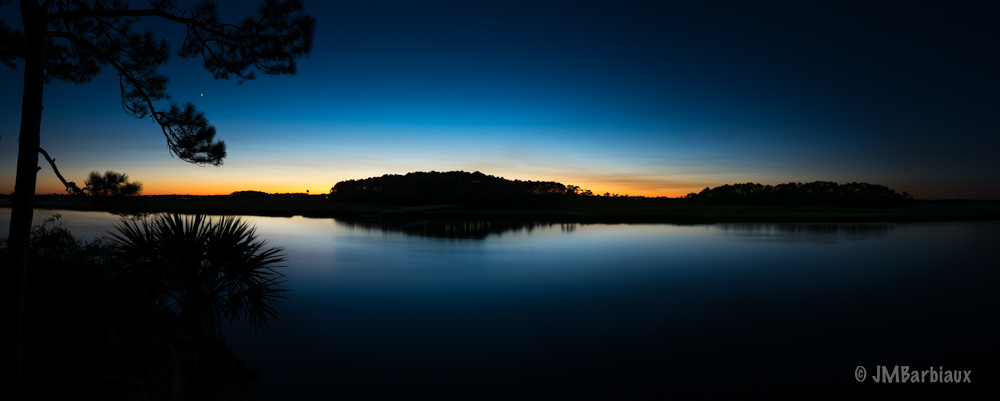
The image above’s white balance is as accurate as I remember and has a clearly cool white balance. The bluish tone of the photograph makes one feel as though it may have been cold out in the scene (the Christmas tree may hint at that as well) and it was… Freezing.
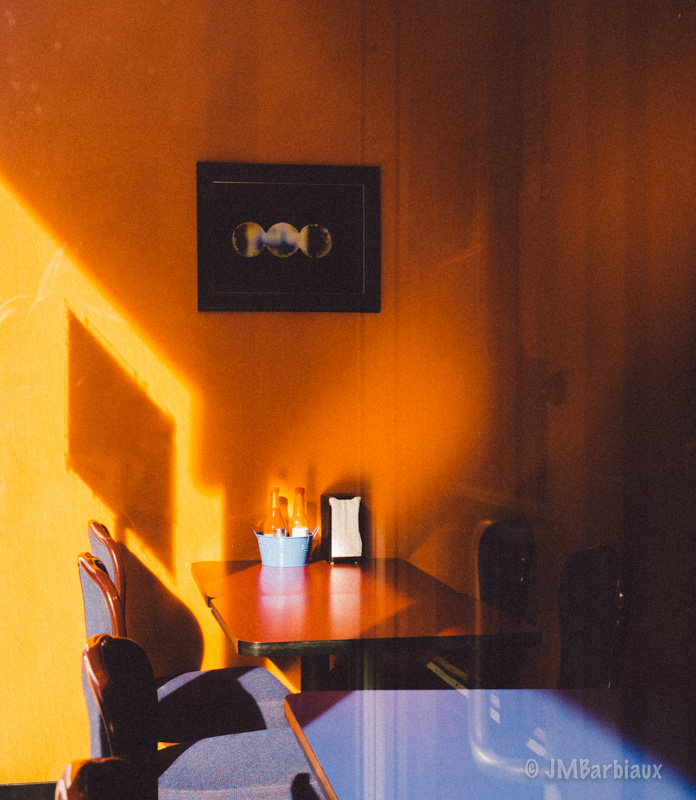
Warmer white balance and you’ve got yourself an image that looks as though it was pretty toasty when you took the shot. Interestingly, in the photograph above it was nearly 30 degrees outside… It just so happened to be sunset which produces a warmer tone due to the angle of the light hitting the earth and having to travel through a greater depth of atmosphere which scatters more of the blue light leaving the light with warmer tones (or something like that).
With all that being said, remember not to put yourself in a box and think you need to have perfect white balance in every photograph. Don’t be afraid to adjust your white balance in post processing warmer and cooler to see what works. Many photographers use split toning and other color fine tuning techniques to completely alter their images to fit their artistic vision.
Conclusion
A strong understanding of light is quite liberating, you begin to see the world in new and interesting ways. An ordinary scene is suddenly painted in a new light (quite literally).
If you really want to study a master of light, check out the book Fred Herzog: Modern Color by Hatje Cantz. His images use light perfectly and he creates painterly photographs from seemingly ordinary scenes. Another photographer who is a master at light, among other things, is Alex Webb.
Feel free to leave your thoughts in the comments section below and head over to Instagram to follow @PhotolisticLife.