Urban photography can encompass a few different genres of photography, cityscape or landscape, street photography, architecture, and macro or abstract. Technically you could do just about any type of photography within the confines of a city, sans maybe landscape astrophotography due to the light pollution. Improving your photography, whether urban or otherwise, isn’t about getting more or better gear… It’s about changing the way you see the city.
Most photographers approach photography with preconceived notions of what types of shots they would like to capture. If you peruse others photography for inspiration you’ll undoubtedly find some images that inspire you and naturally you want to create similar shots. There is absolutely nothing wrong with drawing inspiration from others photography, I encourage it, but if you start to let others photography direct your own photography you run the risk of losing your unique perspective.
Step One – Get Your Unique Perspective Back
Perspective, or your world view, is perhaps the single most important tool you have regarding photography. You know when someone tells someone “you’ve got a great eye”? That’s another way of saying “hey, the way you see things is interesting and refreshing”. Or they just think you’ve got nice looking peepers…
Everyone sees the world differently, your colors don’t look the same as mine… They may be more vibrant or your greens look slightly yellowish. The point is, our brains interpret what we see differently, no one person is the same as another.
When we see things we really like, like impressive photography, human nature would have us try to emulate it. I would challenge you to, instead of trying to reproduce a favorite shot, really look at the shot and dissect what it is that makes this shot stand out. Figure out how you could take the same principles, or compositional elements, and create an equally impressive shot someplace else.
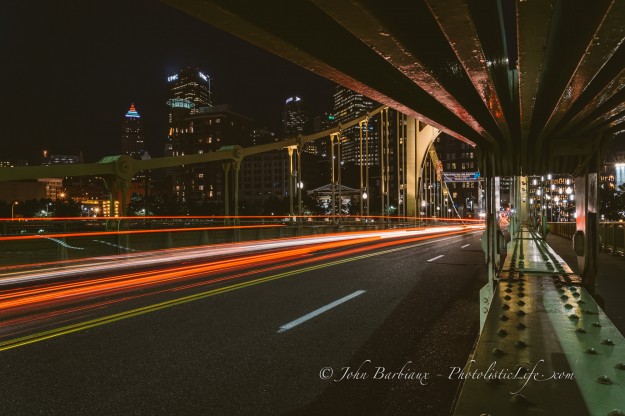 Seeing the world from a different perspective creates unique photographs
When I was teaching myself to play the piano I quickly realized that reading music was like trying to read another language. In order to learn the “language” I would buy large classical piano books and letter each note, some of the books for two or three hundred pages long. By the time I made it through five or six of these books I could read music fluidly and play the piano as fast as I could read the music. The reason I mention this is because if you apply the same principle to photography you can improve your compositional skills without losing your unique perspective.
Try printing off a few of your favorite photographs and notating what compositional elements the photographer was using and what characteristics make said photograph inspiring to you. If you do this enough times you’ll start to ingrain the building blocks that make photographs interesting to you and you’ll be able to apply them to your own unique perspective.
Step Two – Timing Is Everything
Look, I understand you can take great photographs all day long, morning, noon, and night… But I’m fairly confident that the same photographs you took in the middle of the afternoon, when the sun was straight above cooking you like a lobster, will look a hundred times better if you take them in the early morning right before or after sunrise and in the evening right before or after sunset.
The time of day is important but perhaps of equal importance is the timing of your shot. The same scene can change drastically depending on the subjects (people) within it.
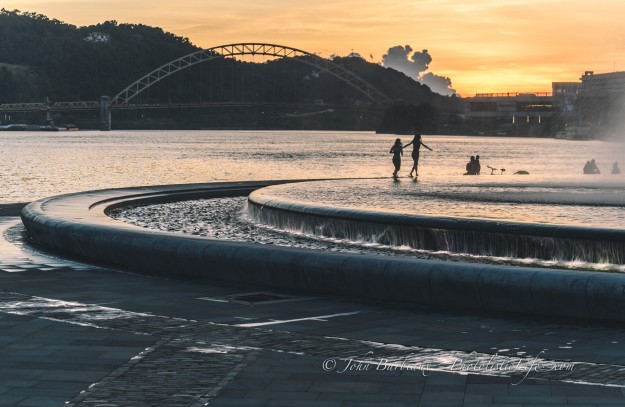 Waiting patiently can reward you with images like this, the children playing in the fountain make this image unique and evokes emotion from the viewer.
Sometimes I arrive just when God’s ready to have someone click the shutter.
– Ansel Adams
A fountain like the one above attracts children and adults, like catnip to cats, on a hot day. On really hot days all you have to do is set up your tripod and wait… There are places like this in every city, places where people can go to let loose and cool down. Don’t be afraid to set up your tripod and spend an hour or more in one place, you’d be surprised at the diverse photographs you’ll capture.
Step 3 – Don’t Pack Up After The Sun Sets
Most of my favorite shots I’ve taken of Pittsburgh, the city I live in, were taken well after the sun had set. Once the sun sets the city takes on an entirely different persona, one of warm lights and mysterious shadows full of homeless people, reflections and light trails. When you compare city shots during the day to ones at night it looks almost as if they are two different places.
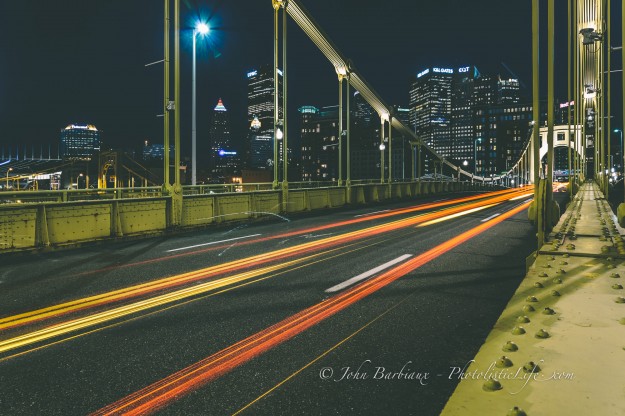 Light trails are easy to achieve and help create unique images.
Photographing after dark requires a little more attention to detail than photographing in bright conditions, not only to your cameras settings but also your surroundings. Always let someone know where you are going to be and when you will return, look behind you periodically, and don’t lose yourself in your viewfinder.
Long exposure photography, that’s what we call photographing at night (in a city or not) with a low ISO and slow shutter speed, requires a tripod. Without a tripod it’s still possible to take urban photographs in the evening but you’ll need a great camera otherwise you’ll end up with a noisy mess of a shot. The shot below was taken handheld, ISO 3200, and a shutter speed of 1/60 sec..
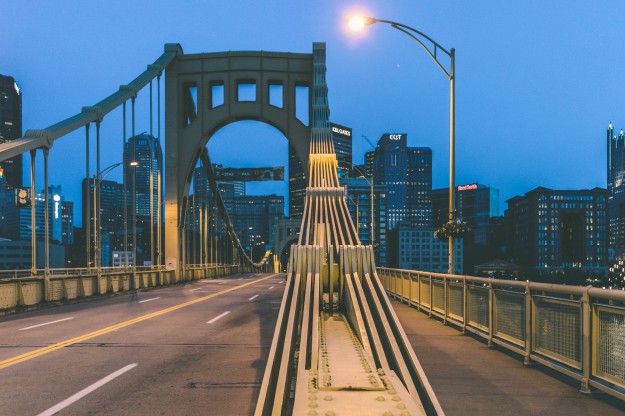 I don’t recommend hand holding the camera in low lighting like this, most cameras will lose detail at an ISO of 3200. This shot was taken with the Nikon Df
 which handles ISO up to 6400+ with incredible detail.
If you plan on hand shooting you may want to put your camera in shutter priority mode and be sure not to drop below 1/30th second if you have some sort of vibration compensation on your lens or camera… If you don’t have vibration compensation then you’ll need to keep the shutter speed equal to the focal length of your lens (if you have an 50mm lens you’ll want a shutter speed around 1/60th second).
The three steps above are sure to improve anyone’s urban photography. If you are still having trouble capturing images you feel are dynamic and interesting be sure to question why it is you’re taking each shot. Don’t “spray and pray” with your camera, be deliberate in your composition and you’ll improve dramatically.


Hey!
Thanx for sharing the post John! It’s worth a read and bookmark! 🙂
Cheers from Berlin,
Alexandre
Hey! Thanks for the feedback, I’m glad you liked it. Have a great day.