Packing
Planning trips can be stressful and exhausting, not to mention the time it takes to pack, unpack, and then pack it again until your carry-on doesn’t look like a blow fish full of clothing. It’s important that you take only the necessarily equipment and you keep it close to you at all times, you should never check your camera or lenses unless you hate them. This doesn’t just apply to airports and buses but also when you are driving, you don’t want to pack your camera and lens in a suitcase that gets smashed by everything piled on top of it or accidentally falls out of the car when you open the door. Besides, the closer your camera is to you the easier it will be for you to catch fleeting moments as you drive, fly, or ride to your destination.
As a side note, if you’re traveling with a another person you can each put part of your clothes in each-others suitcases so if one is lost then no one is stuck wearing the same outfit for 3 days while they track your bags down.
[alert type=”info”]Do not leave your camera or lenses in your checked luggage or they could get smashed[/alert]Gear
Less is more when you are traveling long distances, only take essential gear. You can leave five of your eight lenses at home, you won’t use them all. Pick your favorite three lenses and a couple of lens filters. Grab your battery charger and a few SD cards. You will want to bring a tripod with you, that is once piece of equipment you can leave in your checked luggage when flying, they are tougher than they look. In addition to those essentials here are a few things that have made my life easier when traveling with my photography gear:
Sport Camera Strap
Plan on walking and climbing off the beaten path if you want to take photographs of interesting things from new perspectives, especially if you’re visiting a national park. There is nothing worse than trying to hike or climb around with your camera bouncing off your sternum. A sport strap will slip over one shoulder and drape across your body like a messenger bag, a good strap will have fasteners to keep the camera from jumping around.
I own and have reviewed the BlackRapid RRS-1BB Sport strap and highly recommend it for the active photographer who strays off the beaten path from time to time (here is the review).
SD Card Holders
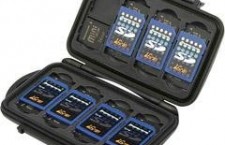 There are usually little plastics containers that come with SD cards meant to store them when you aren’t using them. The container is not much larger than the card itself and is very easy to misplace. I highly recommend investing in a cheap SD card holder of some sort, something bigger than the little plastic cases that will have you searching the floor like you’re missing a contact if you drop it.
I’d recommend Pelican brand holders as they are what the professionals use to protect their gear and the SD card holders are relatively inexpensive. Check out the Pelican 0910-015-110 Memory Card Case – Polycarbonate , its water-resistant, impact resistant, and holds 8 SD cards and 16 mini SD cards.
Camera Backpack
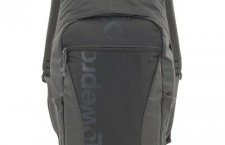 It’s important that you ditch your over the shoulder camera bag from 1997, it’s the equivalent of wearing a fanny pack. It’s also a pain the in butt to lug your gear around, constantly switching from shoulder to shoulder. The Lowepro Photo Hatchback
 is a great solution for a traveler who needs something that isn’t horribly bulky and is versatile. The camera actually fits in the back of the pack, access is covered by your back (this restricts the chance of someone opening your bad and stealing your camera as you read your tourist map). You have room for a couple of lenses on either side of the camera as well as plenty of room for accessories in the top of the bag and down the front.
We reviewed this pack here.
Tripod
The best tripod that I’ve found (I now personally use it) is the Benro MeFoto A1350Q1B Transfunctional Tripod Kit (Blue). Check out the review here.
If you don’t already have a second battery then I’d suggest heading over to Amazon and getting one, you should travel with two batteries all the time. You never know when a battery will die for good and there is nothing worse than being on a photography trip with a dead camera and no way to power it.
Lens
Here is where it gets tricky, no matter what I say you could jump to another site and it will say the opposite. It comes down to your preference. I’ll tell you this though, traveling with prime lenses can be a pain in the butt. Personally, I like a zoom lens. If you are worried that your zoom lens isn’t good enough then I’d suggest purchasing a pro quality lens. Something around the 24-70mm range is perfect for travel, it gives you the wide-angle you’d need for a sweeping landscape as well as some zoom capability to reach in a little if you need to. Zoom lenses are great for zooming past pesky tourists who would otherwise photo bomb you as well.
Mind your surroundings when changing a lens. If you know you will be in an area with lots of dust in the air (i.e. Grand Canyon or sandy beach) you’ll want to refrain from changing your lens as much as you can, otherwise you’ll end up with dust on your image sensor.
Itinerary
Know your limits. Plan your days with plenty of time to get to where you need to be and time to relax as well. Look up the sunrise and sunset times for wherever you’re going to visit and plan around them (there are sunrise and sunset calculators all over the internet, just Google it). Plan on getting to your spot in the morning an hour before sunrise (one hour before sunset as well) to give yourself plenty of time to compose your shot and set up your gear. Pro photographers will visit the area in which they will be photographing before they actually plan to photograph. It’s a good idea to visit these areas during the afternoon since you’ll likely be taking a break from photographing due to the harsh light.
Buy a map of the area or a good travel book with maps printed inside (Books by Lonely Planet are a good start, you can find just about every travel book on Amazon for a fraction of the cost of brick and mortar stores). Don’t rely on your smart phone or tablet device, you can’t be certain there will be service or WiFi in areas you’ve never visited. Will you need to take a bus? Have a rental car? Is there a subway system? These are all things you need to figure out before you get there. Google search landmarks in the area and then map them out to see if it is feasible to visit them.
For the anal more prepared people out there you can even break your itinerary down day by day, for example:
Itinerary
Day 1: Drive around and get the lay of the land, find someplace to photograph the sunset.
Day 2: Revisit some interesting places you found on day one and get the sunrise and pick a new place to get the sunset.
Day 3: Visit Landmark furthest away (the one you mapped when you were home) and work your way back towards your hotel, tent, hacienda, or vacation home.
Day 4: Relax in the morning then get 20 beautiful shots of the color red.
Day 5: Visit new place for sunrise, get some afternoon shots in town, relax, get sunset in new area.
Research
It’s a good idea to Google images search the area you’ll be visiting, it will give you plenty of photographs others have taken in and around where you’ll be visiting. Use these photographs as an example of what you don’t want to do, you don’t want to stand right where someone else stood and take the same photograph. Be original, take original photographs, change your perspective.
If you’d like to photograph animals in their habitat you may want to see if there are any nature preserves or wildlife tours in the area you are visiting. You can sometimes get reduced rates by pre-booking these trips so look them up a good month ahead of time. Stick with companies that have a website and look reputable, it’s not a good idea to hop on a beat up boat with a guy named Captain Stab and head out to sea to dolphin watch. As with anything, if you are by yourself make sure you let someone know where you plan on going and when you plan on returning.
[alert type=”info”]Always keep a form of ID with you and any important medical information.[/alert]If you follow this simple plan you will be far better prepared than most folks who just show up with camera in hand and wander around like tourists. There is nothing wrong with that mind you, it’s just not very efficient if you’d like to see as much as possible in a limited amount of time.


Great tips! Personally, if lens space is limited, I use my all in one – 18 – 200mm. Saves changing lenses and gives me most of my shots! Like you said…as soon as you say one lens, everyone will have a different opinion! I used to also carry my 50mm but after buying a 60mm macro, am starting to used that one more for detail shots. Lens #3 – 100mm macro. Sometimes it just has too much power, but if I know I will want that 100mm range, it is such a beautiful lens!
Like the Google tip. Have found much inspiration from looking at other people’s work. Hope that reading more photo blogs will help me to become a better photographer, whether learning a new technique or opening my eyes to a different point of view! While I have had a number of compliments on my photos, there are so many amazing photographers out there…always something new to learn!
Happy shooting.
@AnitaMac Thanks, great input. I’ve had a chance to check out some of your photographs from your site and they are beautiful.
@John Barbiaux Thanks John! Much appreciated….helps that I have so many stunning subjects on the road!