Unlike street photography, Landscape photography demands an almost clinical approach. Things like exposure, composition, and clarity have got to be perfect… And there really isn’t any excuse not to get them perfect with modern cameras and the fact that, with a little planning, you’ve got plenty of time to dial in the correct settings, test, adjust, test, and adjust again. One of the most challenging aspects of this for any photographer is making sure focus is absolutely perfect from the very front of an image to the very back. Fortunately, there is an incredibly easy solution that involves a couple of extra shots and about 2 minutes in Photoshop. Focus stacking.
Why?
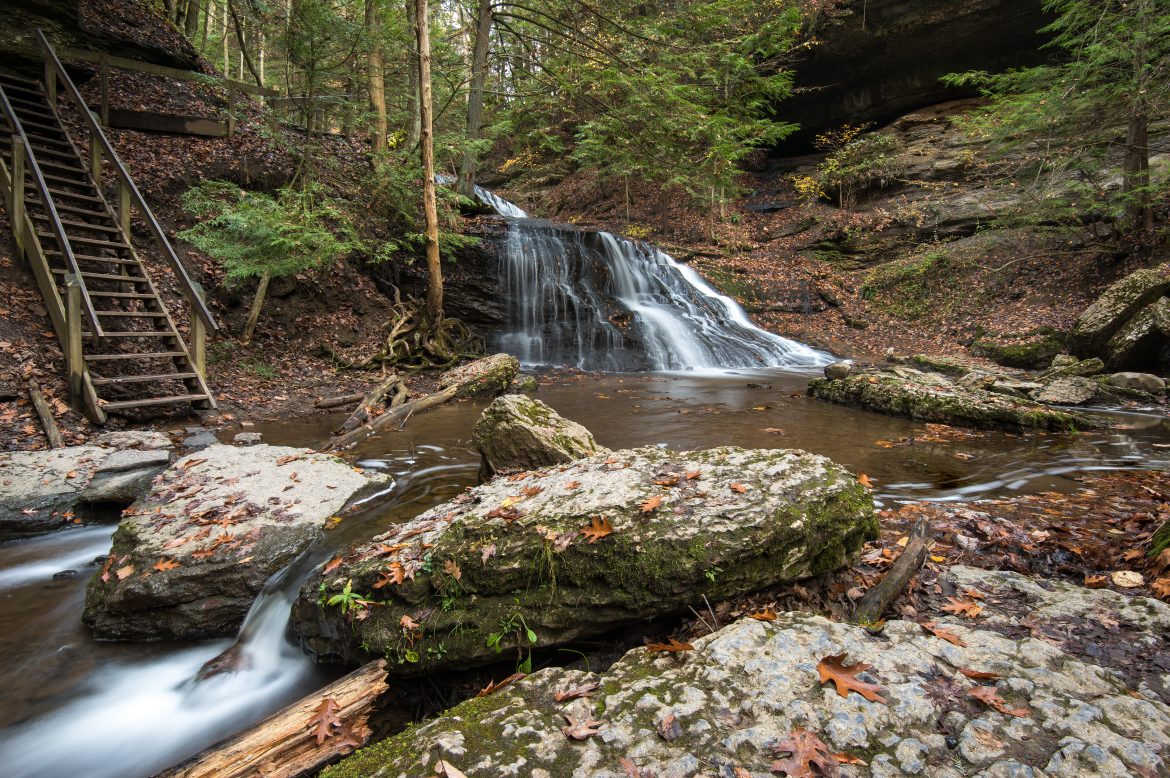
The traditional approach of focusing a third of the way through the frame works 80% of the time but I’m assuming you don’t want a 20% margin of error. Calculating hyper focal distance works about 90% of the time and is still not perfect (some images will still have a small area in the foreground that has to be sacrificed for depth of field to infinity). Focus stacking is fool-proof, is often faster than calculating hyper focal distance (even when using your smartphone app), and gives you an image where every inch is tack sharp.
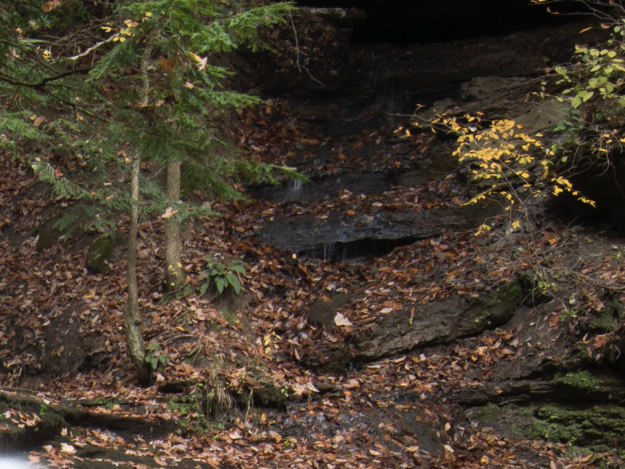
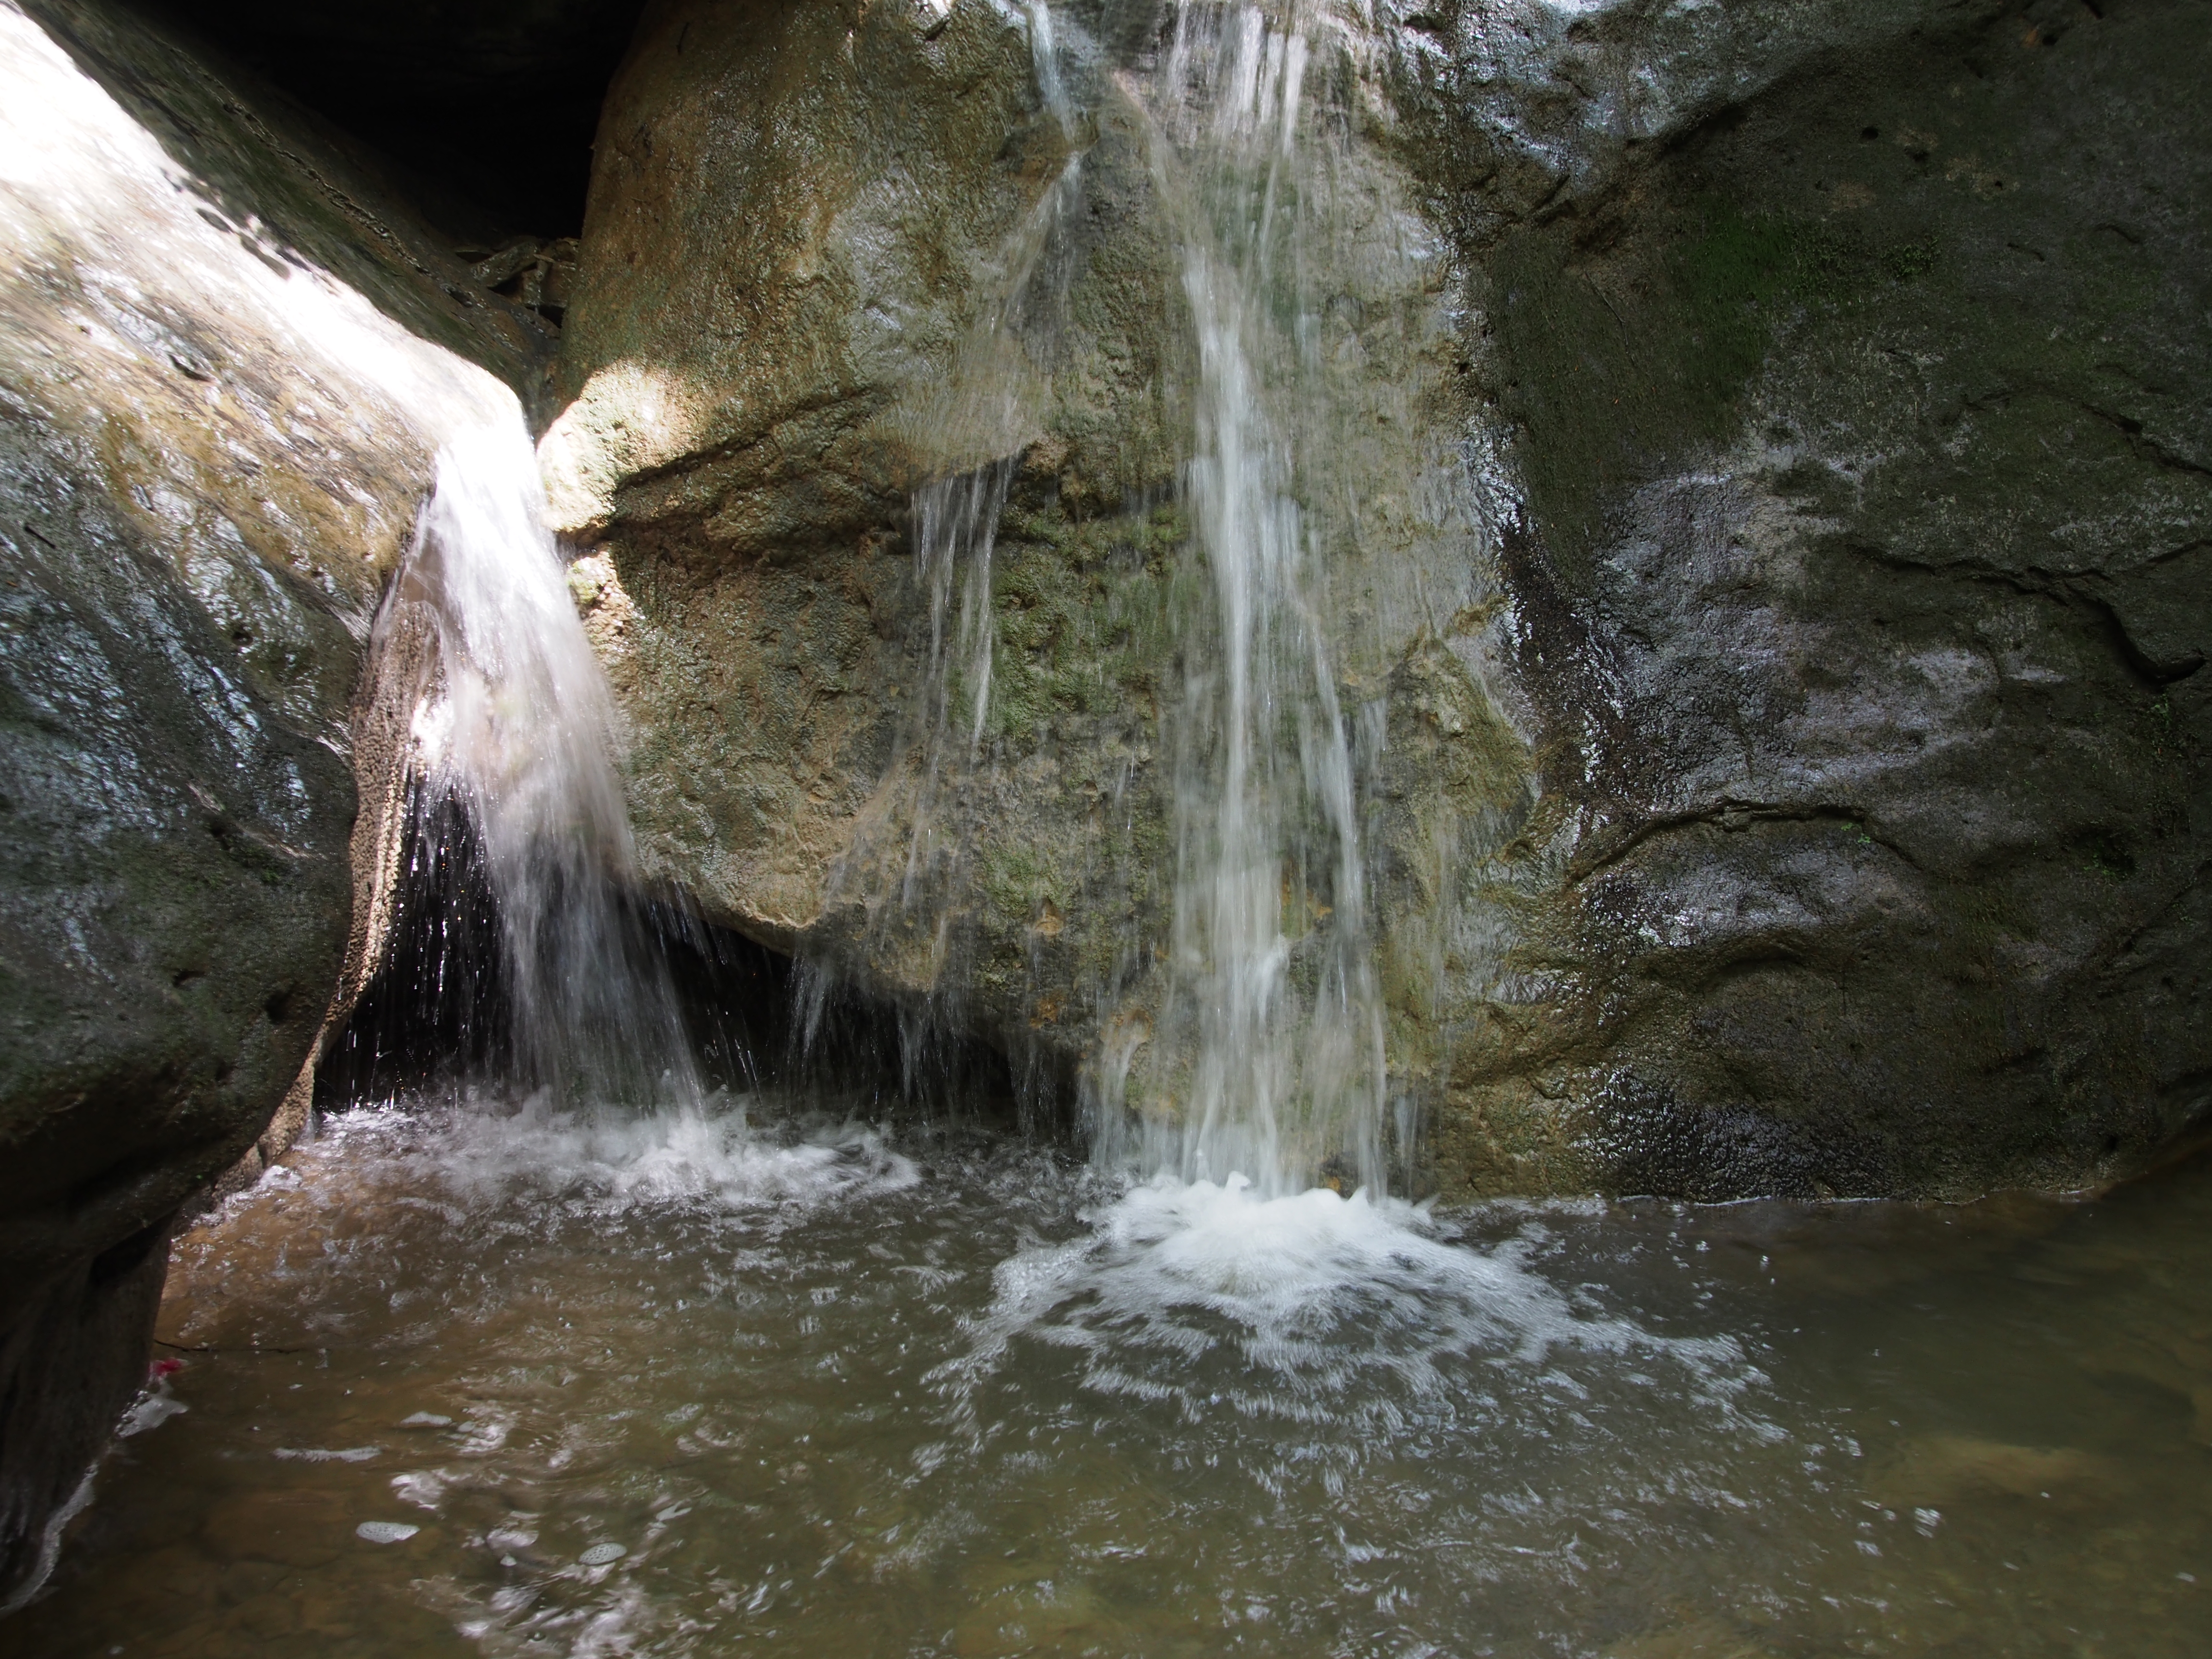
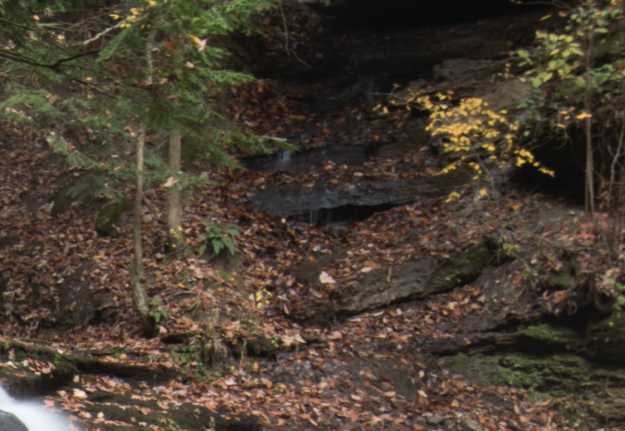 Here you see a crop of the top of the frame above before implementing focus stacking.
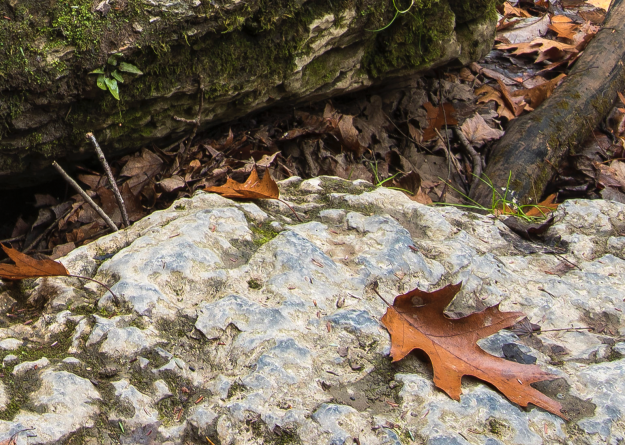
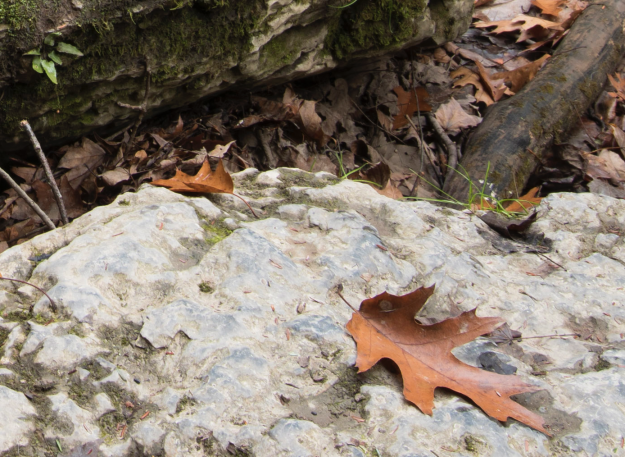 Here is the foreground of the image above before focus stacking.
How?
On a difficulty scale of 1 – 10, 10 being very difficult, this process would fall right around one or two. If you have never used Photoshop before you will be able to read this article and begin focus stacking immediately. Here are the simple steps to creating sharper landscape photography like the pros.
Step 1:
Those of you familiar with bracketing to create higher dynamic range in your images (exposure bracketing) will feel right at home with this step, we’re going to focus bracket. You can bracket any number of frames you’d like (more for macro work and generally less for landscapes).
Set your aperture to somewhere in the neighborhood of f/9 to f/11… Depending on your lens much higher than this and you’ll end up with softer images because of diffraction (light begins to spread out when passing through tiny openings rendering images softer). Adjust your shutter speed in relation to your aperture. Your ISO should be the lowest your camera can possibly do natively. USE A TRIPOD! This should have been obvious as soon as we started talking about sharpness. Besides that, you’ll need all the frames to match up in post-processing when you are ready to merge them.
Step 2:
Once your camera is perched atop the tripod and your settings are all dialed in you can begin the process of creating the images. For this exercise we will focus on (pun intended) taking only three images. You are going to focus on the foreground for shot one, mid ground for the second shot, and finally the background or infinity (focus as far away as you can).
Step 3:
Import your images into Lightroom* or equivalent software. Do not auto level your horizon or adjust for your camera/lens profile yet. Do nothing but highlight the three images you are going to be stacking.
*I’ll be using Lightroom and Photoshop for this tutorial but you can certainly achieve the same result using other programs. Though, Photoshop is the easiest that I know of.
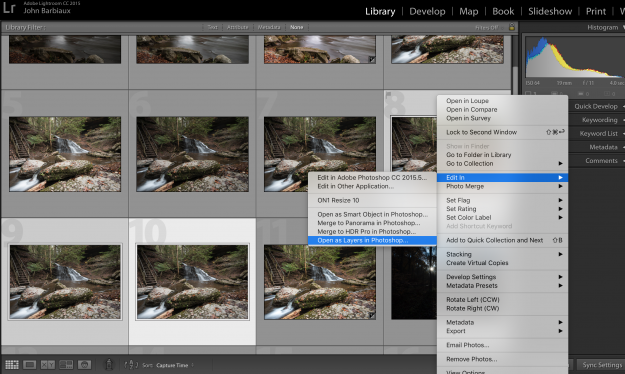 Once the three images are highlighted you’ll need to right-click, hover over Edit In and then Open as Layers in Photoshop. This will then open Photoshop automagically and you can begin the process of aligning the frames (in case you bumped your tripod even the slightest bit) and then merging them.
Step 4:
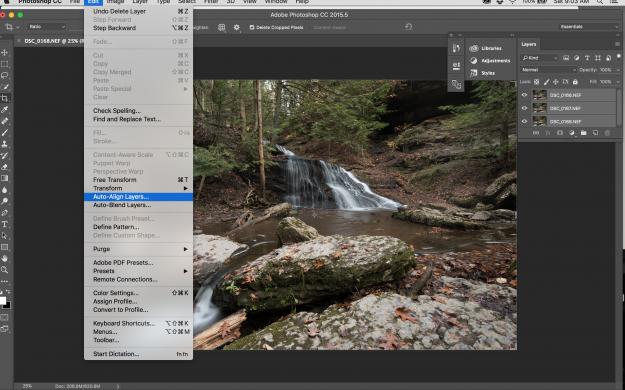
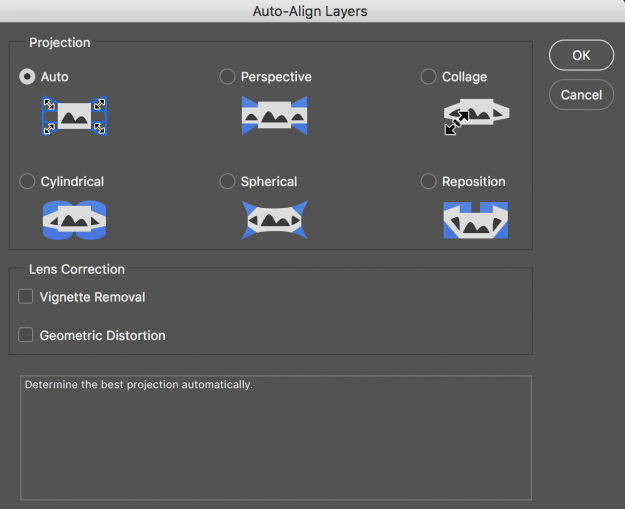
Once the images have been imported as layers into Photoshop you’ll need to highlight all of them in the layers panel and head over to Edit and Auto Align. Just leave the default setting on Auto and hit OK.
After auto aligning the frames you may notice a little grey area somewhere around the border. You can either use content aware fill or simply crop that part of the image out. For the sake of time I generally crop unless I would lose something that actually adds to the composition of the image.
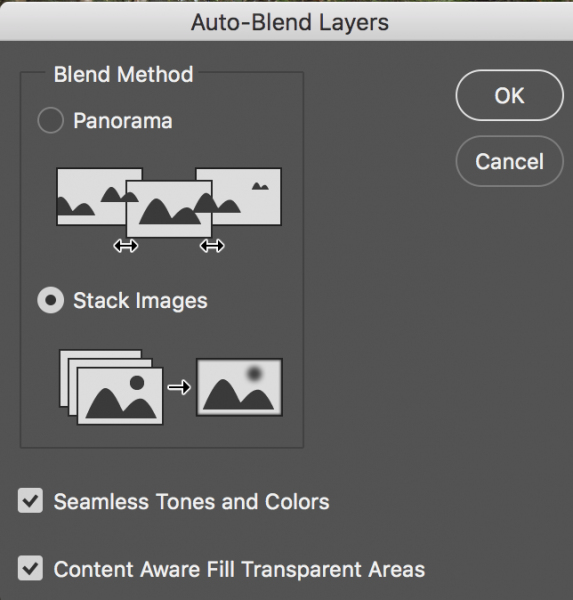
Now you are ready to Auto-Blend the layers. Make sure all the layers are still highlighted and click the Auto-Blend menu item right below Auto-Align that you pressed earlier (refer to the image above). Once clicked, this will open a window asking how you’d like to merge them. Click Stack Images, Seamless Tones and Colors, Content Aware Fill Transparent Areas.
That’s it!
Step 6:
To bring the image back to Lightroom when you are finished you can simply click the menu item named Layer and click Flatten Image (second to last option in the menu drop-down). Then go to File, Save (not Save As) and your image will be saved back to where you imported it from.
Conclusion
Though there are six steps, they are very quick and easy so there really isn’t an excuse not to use focus stacking to take your landscape photography to the next level. Feel free to leave your thoughts in the comments section below.



Good article John. Examples show how much difference this can make, which I’d not really believed before.
Is there a minimum or a maximum aperture to use?
Helen, thank you! I agree, the samples really shine a spotlight on the potential difference. Every lens has a maximum aperture right before images suffer from diffraction. Unfortunately each lens is different so it take some trial and error. If you aren’t sure I’d try to stay between f9 and f11. I’m sure if you Google the specific lens you are using you’d probably be able piggy back off someone else’s testing. No minimum really, just know the wider your aperture the smaller your depth of field so you’ll need to compensate by making more exposures closer together throughout the frame. Hope that helps!
Thanks John. I’m going to get tripod out soon and try all this.
Good article. Just a quick question: Was this post processed using Adobe CC?
Thank you! Yes, I use Adobe CC.
Now, assuming I am really ambitious, 3 shots HDR bracket, rear focus, 3 shots HDR bracket mid focus, 3 shots HDR bracket near focus – possible to HDR then stack ?
Absolutely, it’s possible. Of course it just adds to the amount of time in post processing. I would recommend doing the HDR first rather than focus bracketing 3 separate times (plus you may run into an issue if you auto merge all three then try to HDR merge them as each of the three may have changed enough where merging for HDR is too complicated for the software).
Interesting post. How would you focus stacking a scene with moving objects, e.g. water, leaves, a foreground with grass, etc.
Hey, the software is pretty good with moving objects… as you can see, there was a lot of moving water that merged without an issue in the image here. With all the frames you will be taking for focus stacking you can focus stack and, if you notice a problem, import that finished image back into Photoshop and then import the other images you used to focus stack… Once these images are imported as layers you can use inverted layer masks to brush in the trouble areas from frames that are in focus where you have the trouble area. Make sense?
Makes sense. Thanks for the explanation.
In your example, the leaves on the trees did not move much between frames. I encounter this problem a lot when doing HDR. If the scene is windy and the foreground and background objects are moving a lot — mostly trees/grass etc. — then the movement is very challenging to mask out, especially if I shoot more than 3 exposures. Does masking still help in this scenario? I am only asking as we are at the end of fall here (Princeton, New Jersey) and it’s been a very windy week. I want to try the focus stacking technique but … the trees and leaves and moving a lot.
Hi John,
focusing should be auto or manual?
Either works but manual is more precise in my experience. The challenge with autofocus is that low light (including shadows) can cause focus to hunt or miss and you end up with part of the image looking soft. With that being said, in great light or if you’re patient enough to check focus after each shot auto focus should be fine. Thanks for reading, take care!