Landscape photography is one of the most popular genres of photography. If you look at websites like 500px or Flickr you’ll find that the vast majority of most popular photographs are landscape photographs. If you think these photographs are uploaded straight out of the camera you’d be grossly mistaken. Whether you’re interested in garnering more likes on social media or simply want to inject new life into your landscape images, these three tips will improve your landscape photography.
Understanding the limitations of you camera, you computer, and your own skills can go a long way to improving your abilities to extract the maximum potential from your images. If you aren’t proficient in Photoshop or paint drys faster than your computer loads an image you should know that taking extra time getting the shot as close to perfect in camera is your priority. If you are proficient and your computer doesn’t hate you, you have a little latitude in regards to in camera perfection.
Envision The End Product
Ansel Adams called this previsualization, “the ability to anticipate a finished image before making the exposure” (Wikipedia). Lots of photographers are familiar with this concept but how often do you apply it to your practice? I can’t speak for Mr. Adams but I would guess that it wasn’t something that he thought about once and then went about his workflow of photographing, developing, and printing his images… Previsualization is something that you need to do at every step from composing the photograph, to editing, to printing.
Don’t Be A Slave To The Histogram
Popular landscape articles on the web, magazine, and in books will teach that in order to perfect your landscape photography craft you’ve got to submit to your histogram and avoid (at all costs) clipping your highlights or shadows.
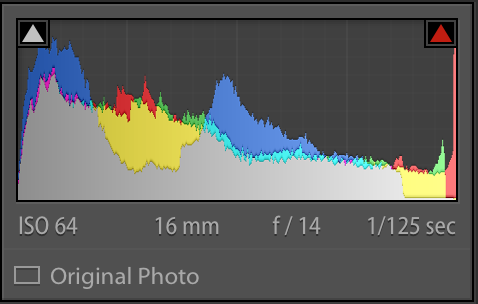
The truth is, when you are a beginner, that is great advice. Think of the histogram as the bumpers they put into the gutters at the bowling alley when you are a child. The bumpers let you still have fun without the risk of completely ruining your game. The boundaries on a histogram work much the same way, while you are learning how your camera and light interact the histogram helps you to avoid completely ruined over or under exposed images.
As you might have guessed, my histogram hated me after I edited this photograph.

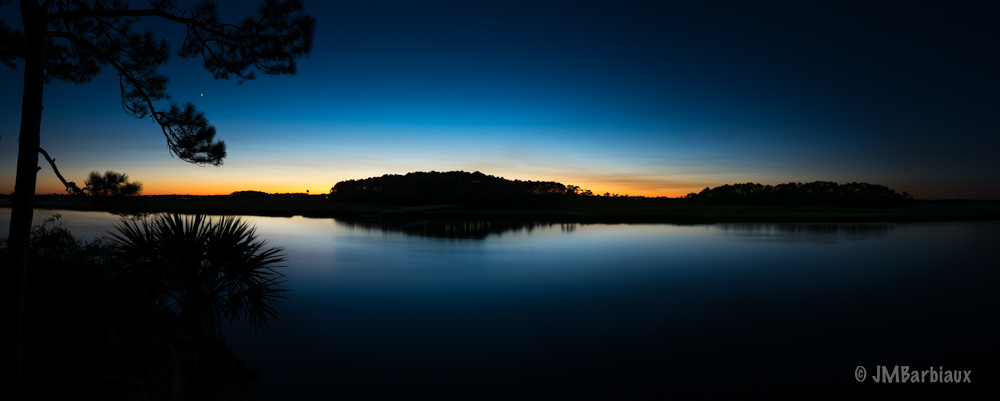
Once you break free of the mental restrictions you learn early on in photography you can create more dynamic images and become a painter of light.
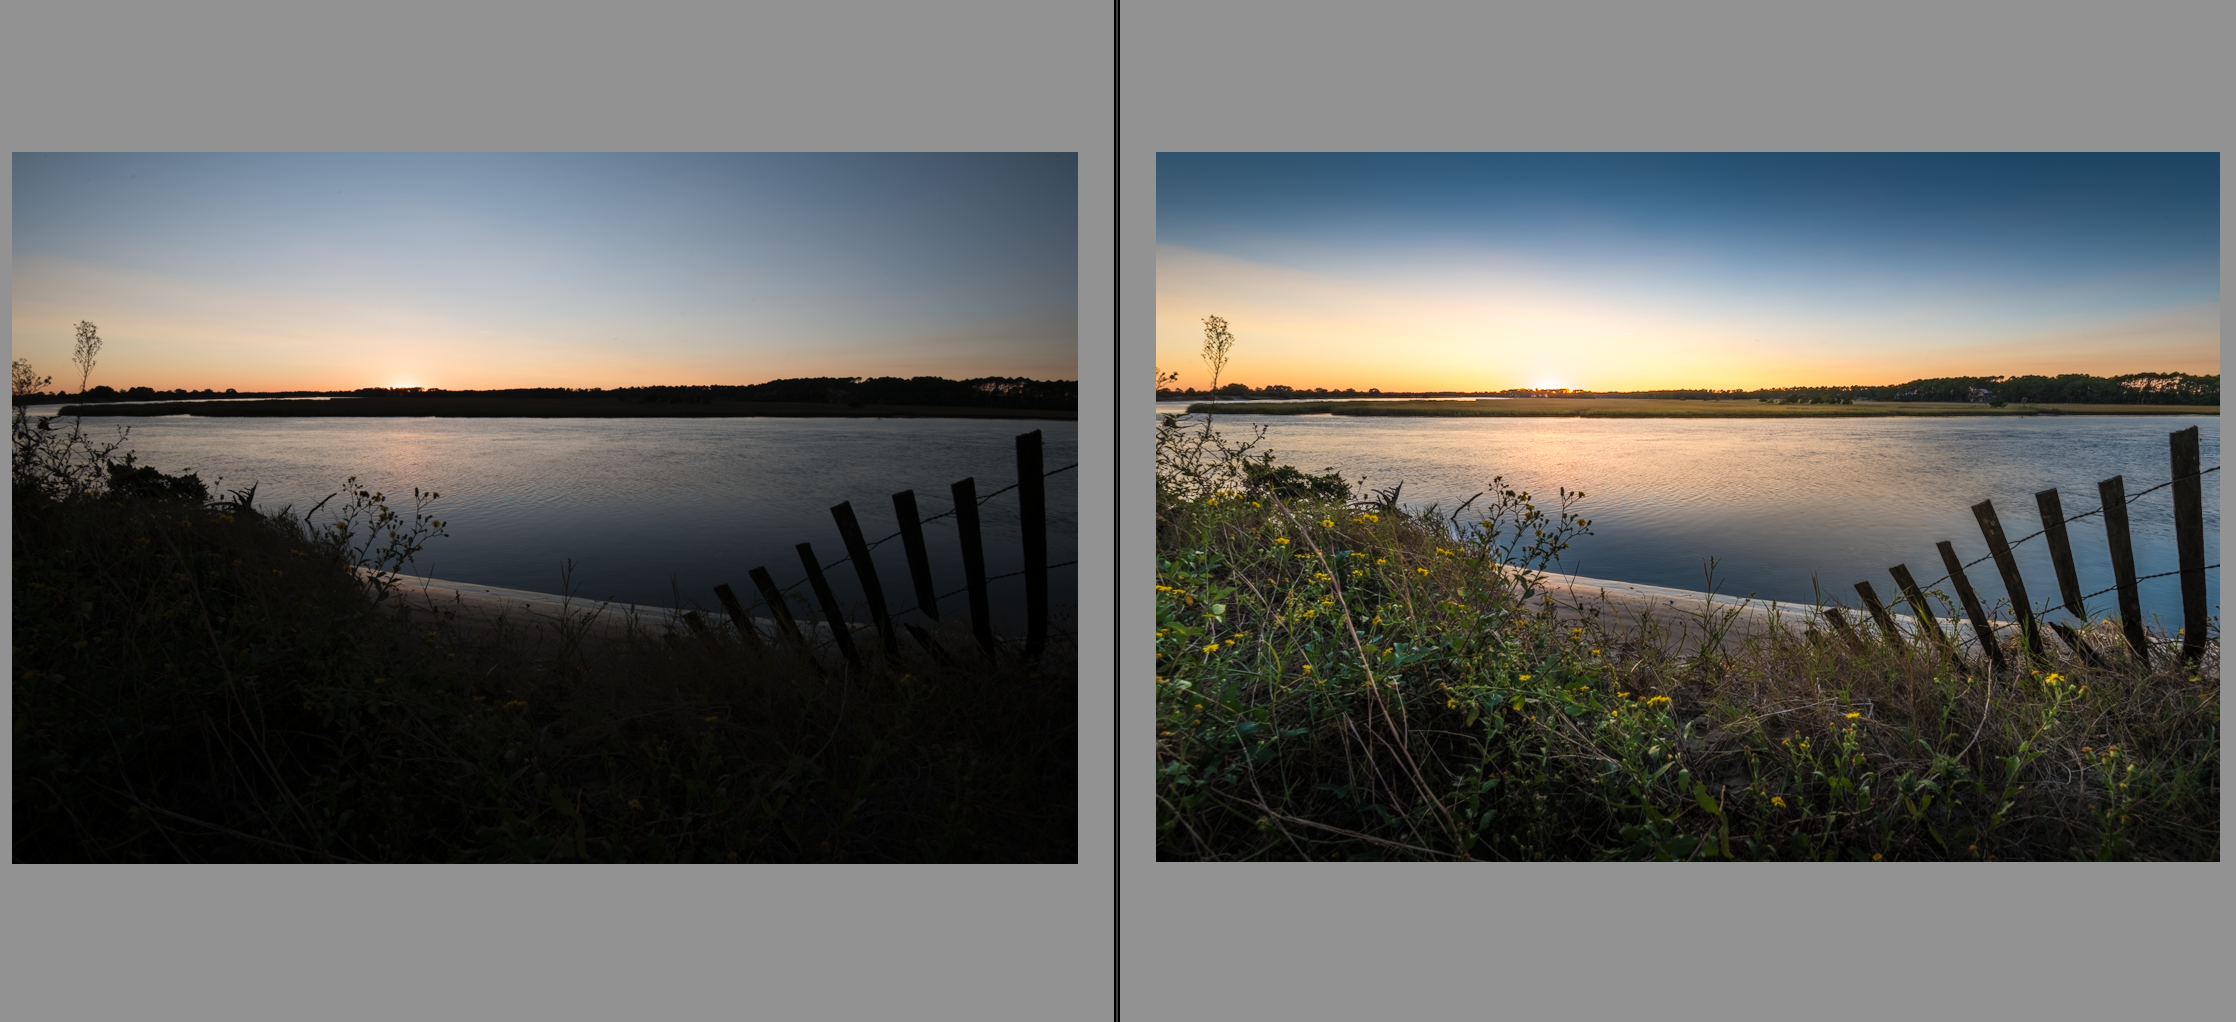
Dodge And Burn
If you only remember one thing from this article remember to dodge and burn your photograph. This is where you selectively darken or lighten (respectively) specific ares of the photograph. Dodging and burning your photograph can take a rather flat looking image and turn it into something that pops… It can also be a great way to emphasize your subject or direct your viewers eyes through an image the way you’d like.
Conclusion
With the number of photographers growing by the minute it is tougher than ever to set yourself apart from the pack. Following these three steps will help separate your images from the vast majority of images being uploaded to the internet from folks camera wielding smartphones.
*Post processing your images does not make poorly composed or uninteresting images better… Like the saying goes, “you can put lipstick on a pig, but it’s still a pig”.
For a complete walk-through of my post processing workflow on landscape photography you can check out the video below.